
Get Started with Direct
A step-by-step guide to help you get started with Direct.
Account Setup Guide
Don't forget to follow the steps to add Destination Account and Generate API Key.
Swagger API Documentation Guide
Instead of Postman, we use Swagger for Direct.
1. Visit our Swagger API Documentation
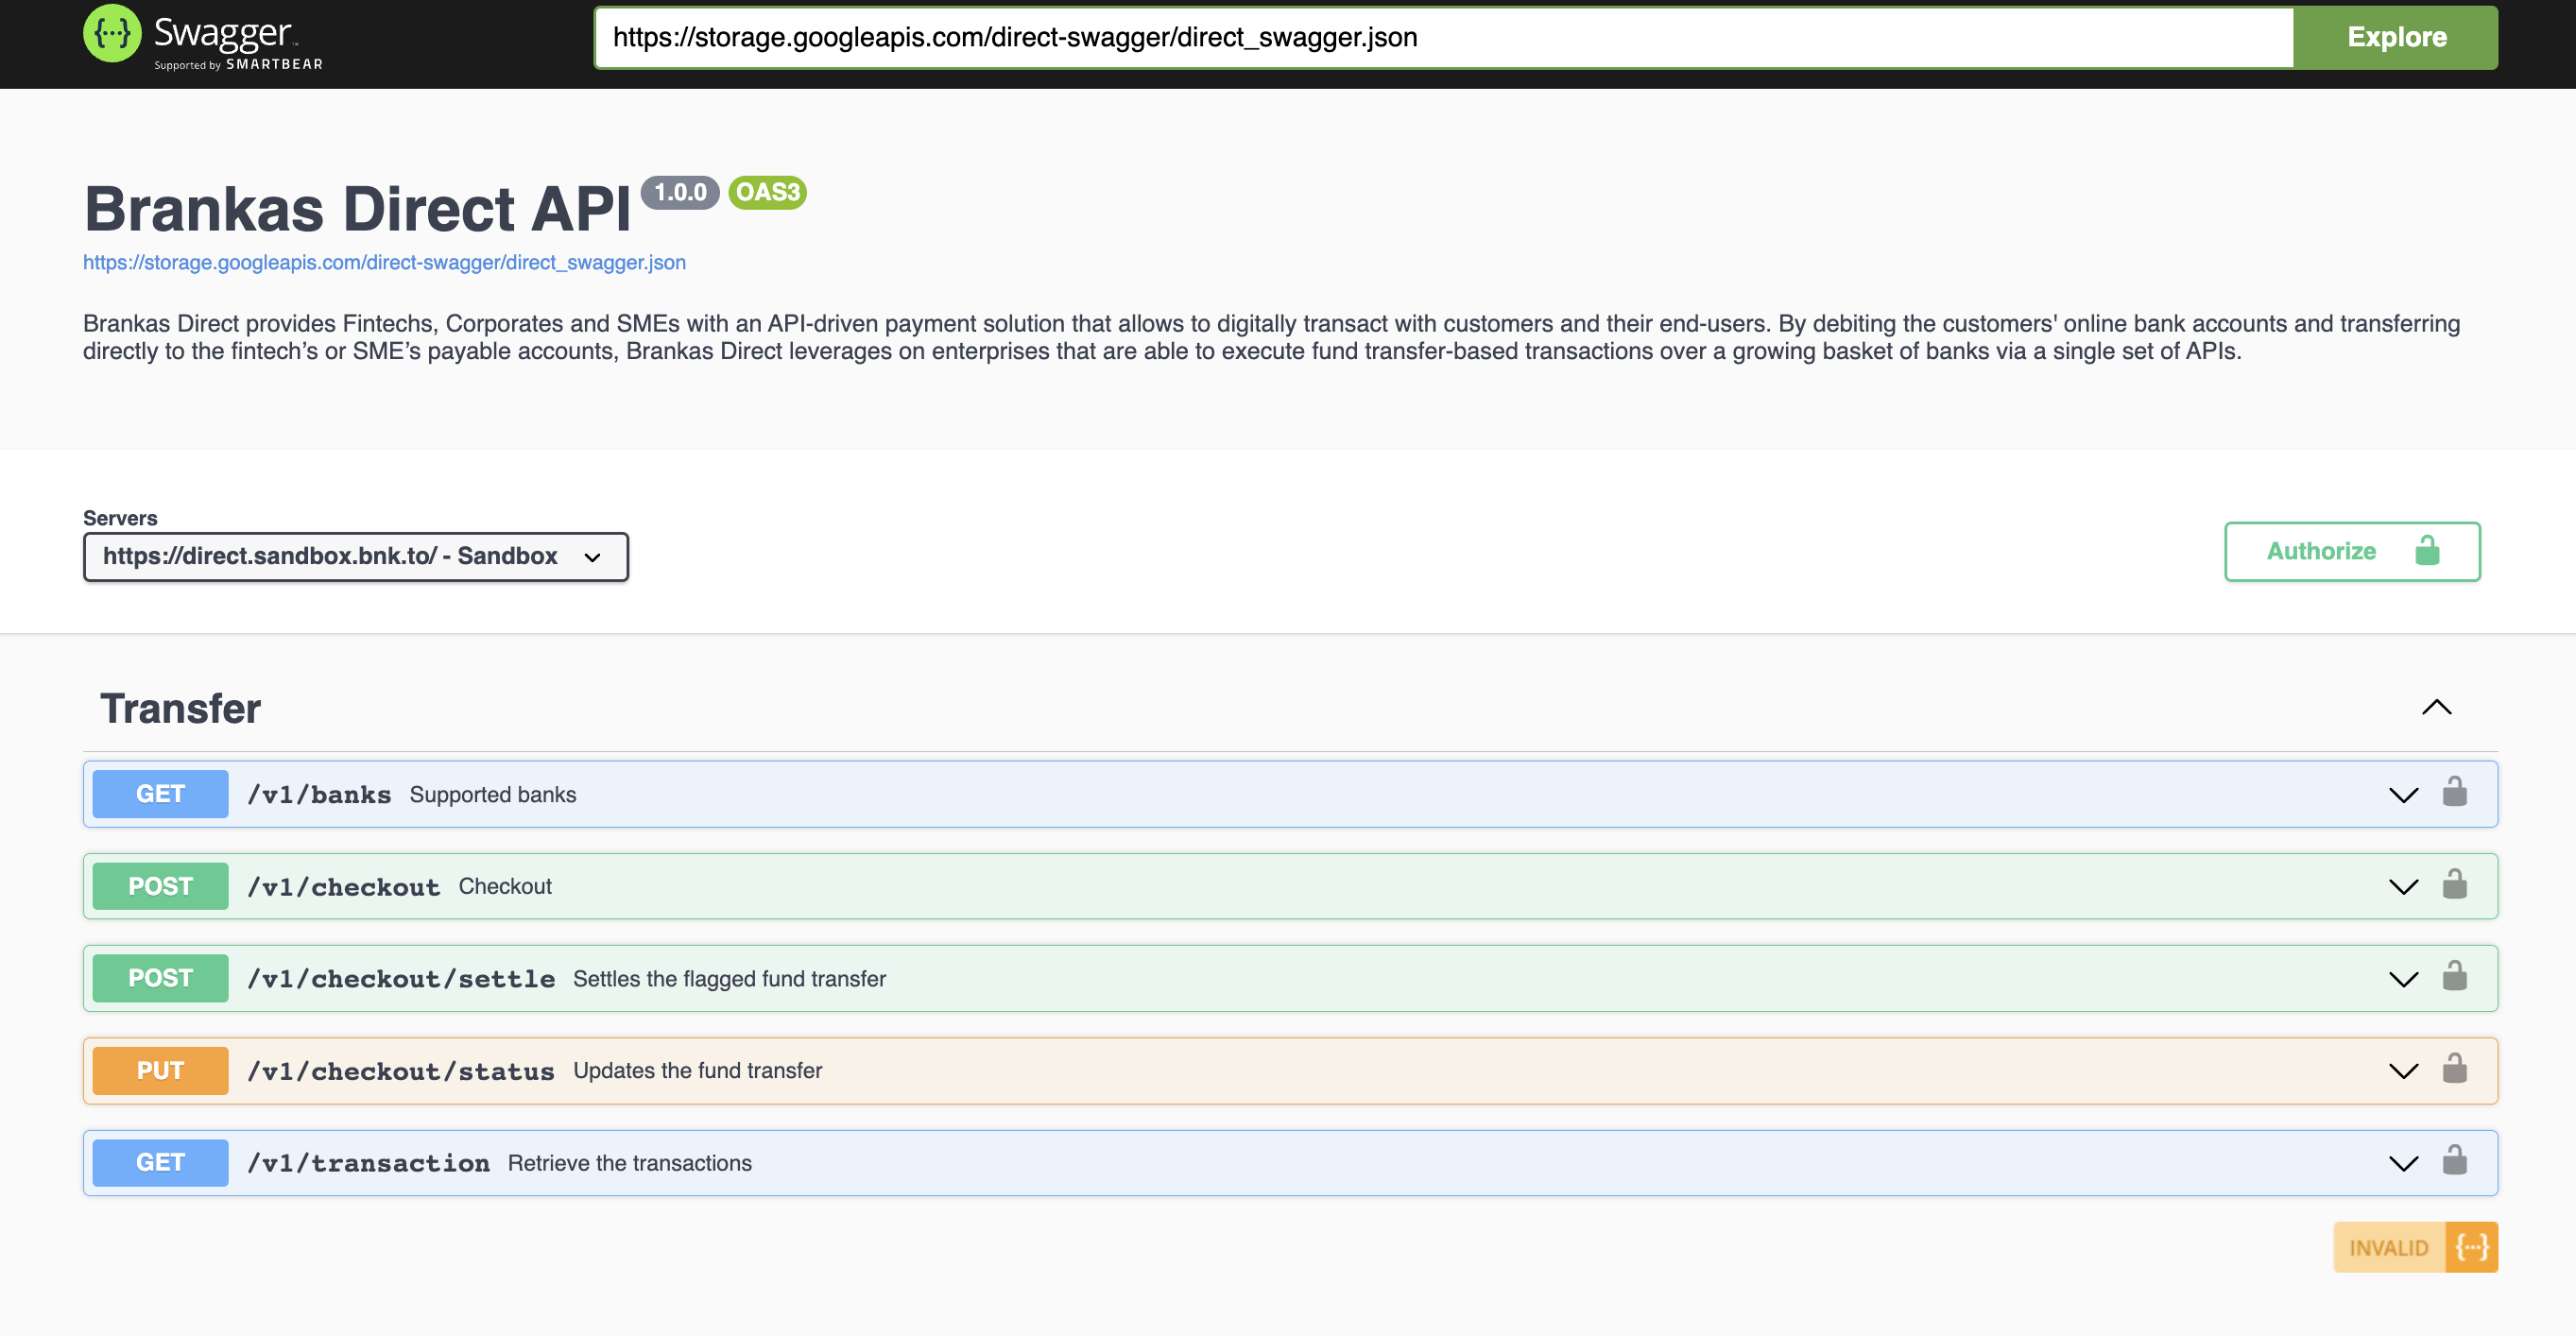
- Click 'Authorize' to choose the server mode
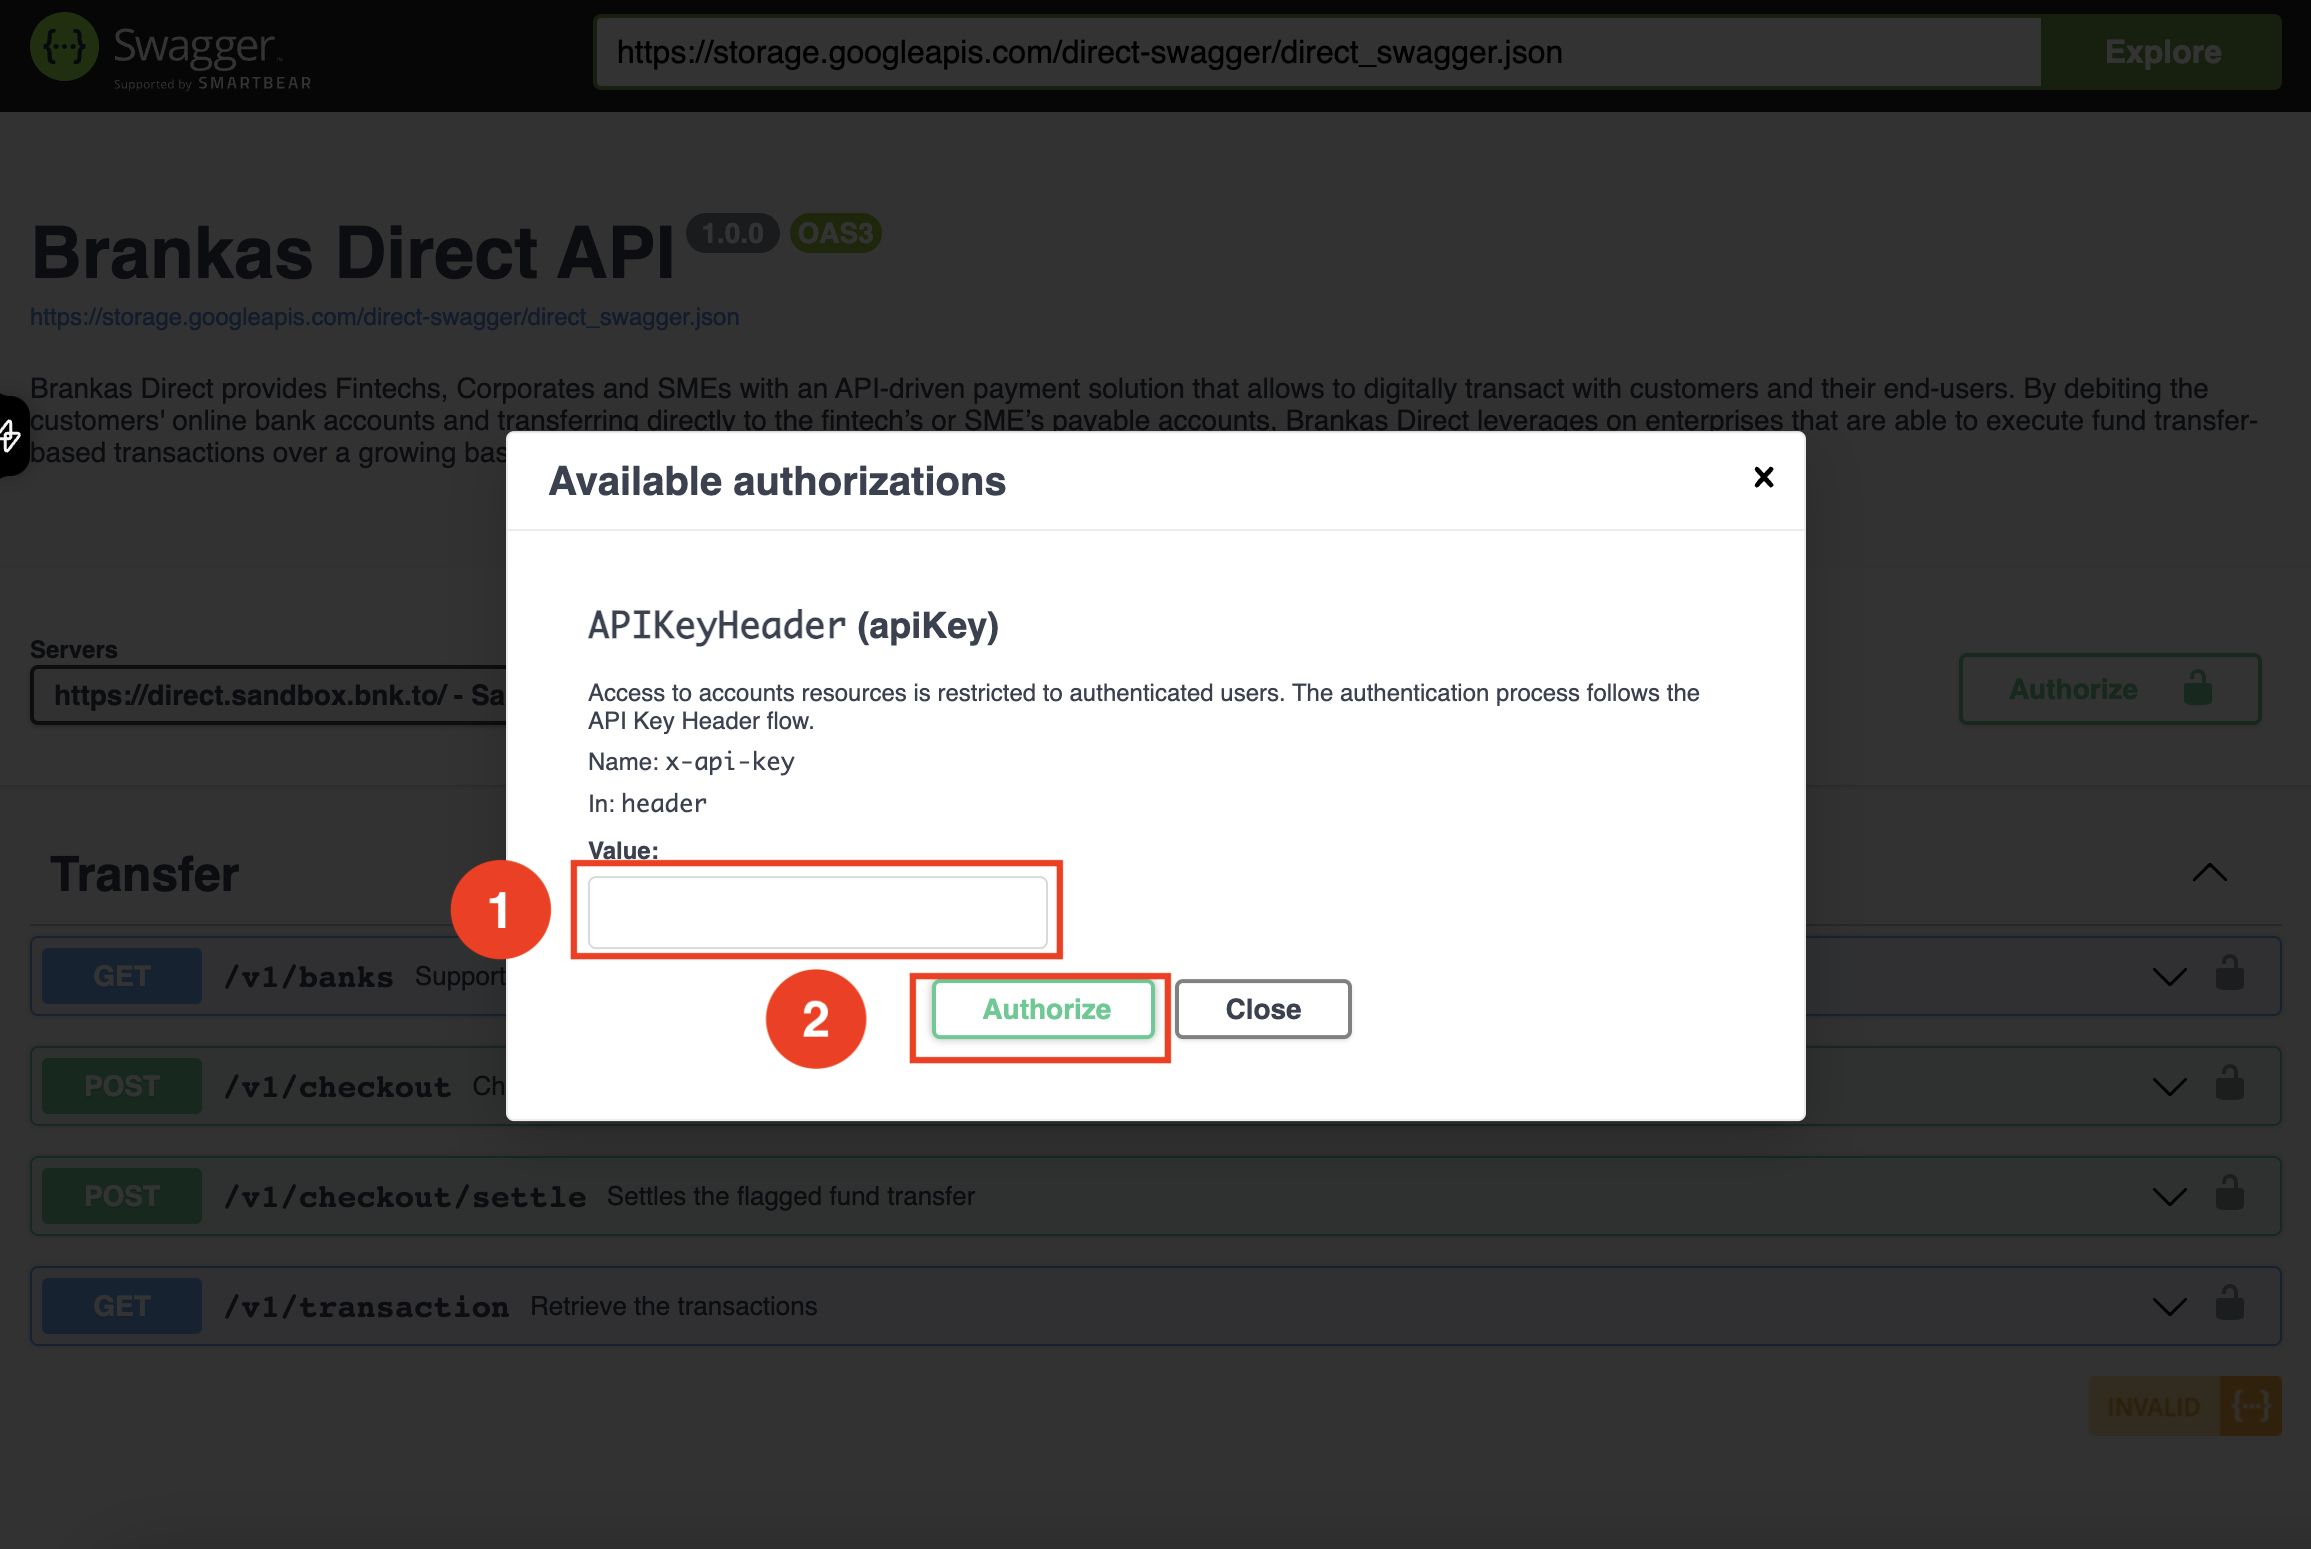
- Insert your server API-KEY generated from our Brankas Dashboard and click Authorize.
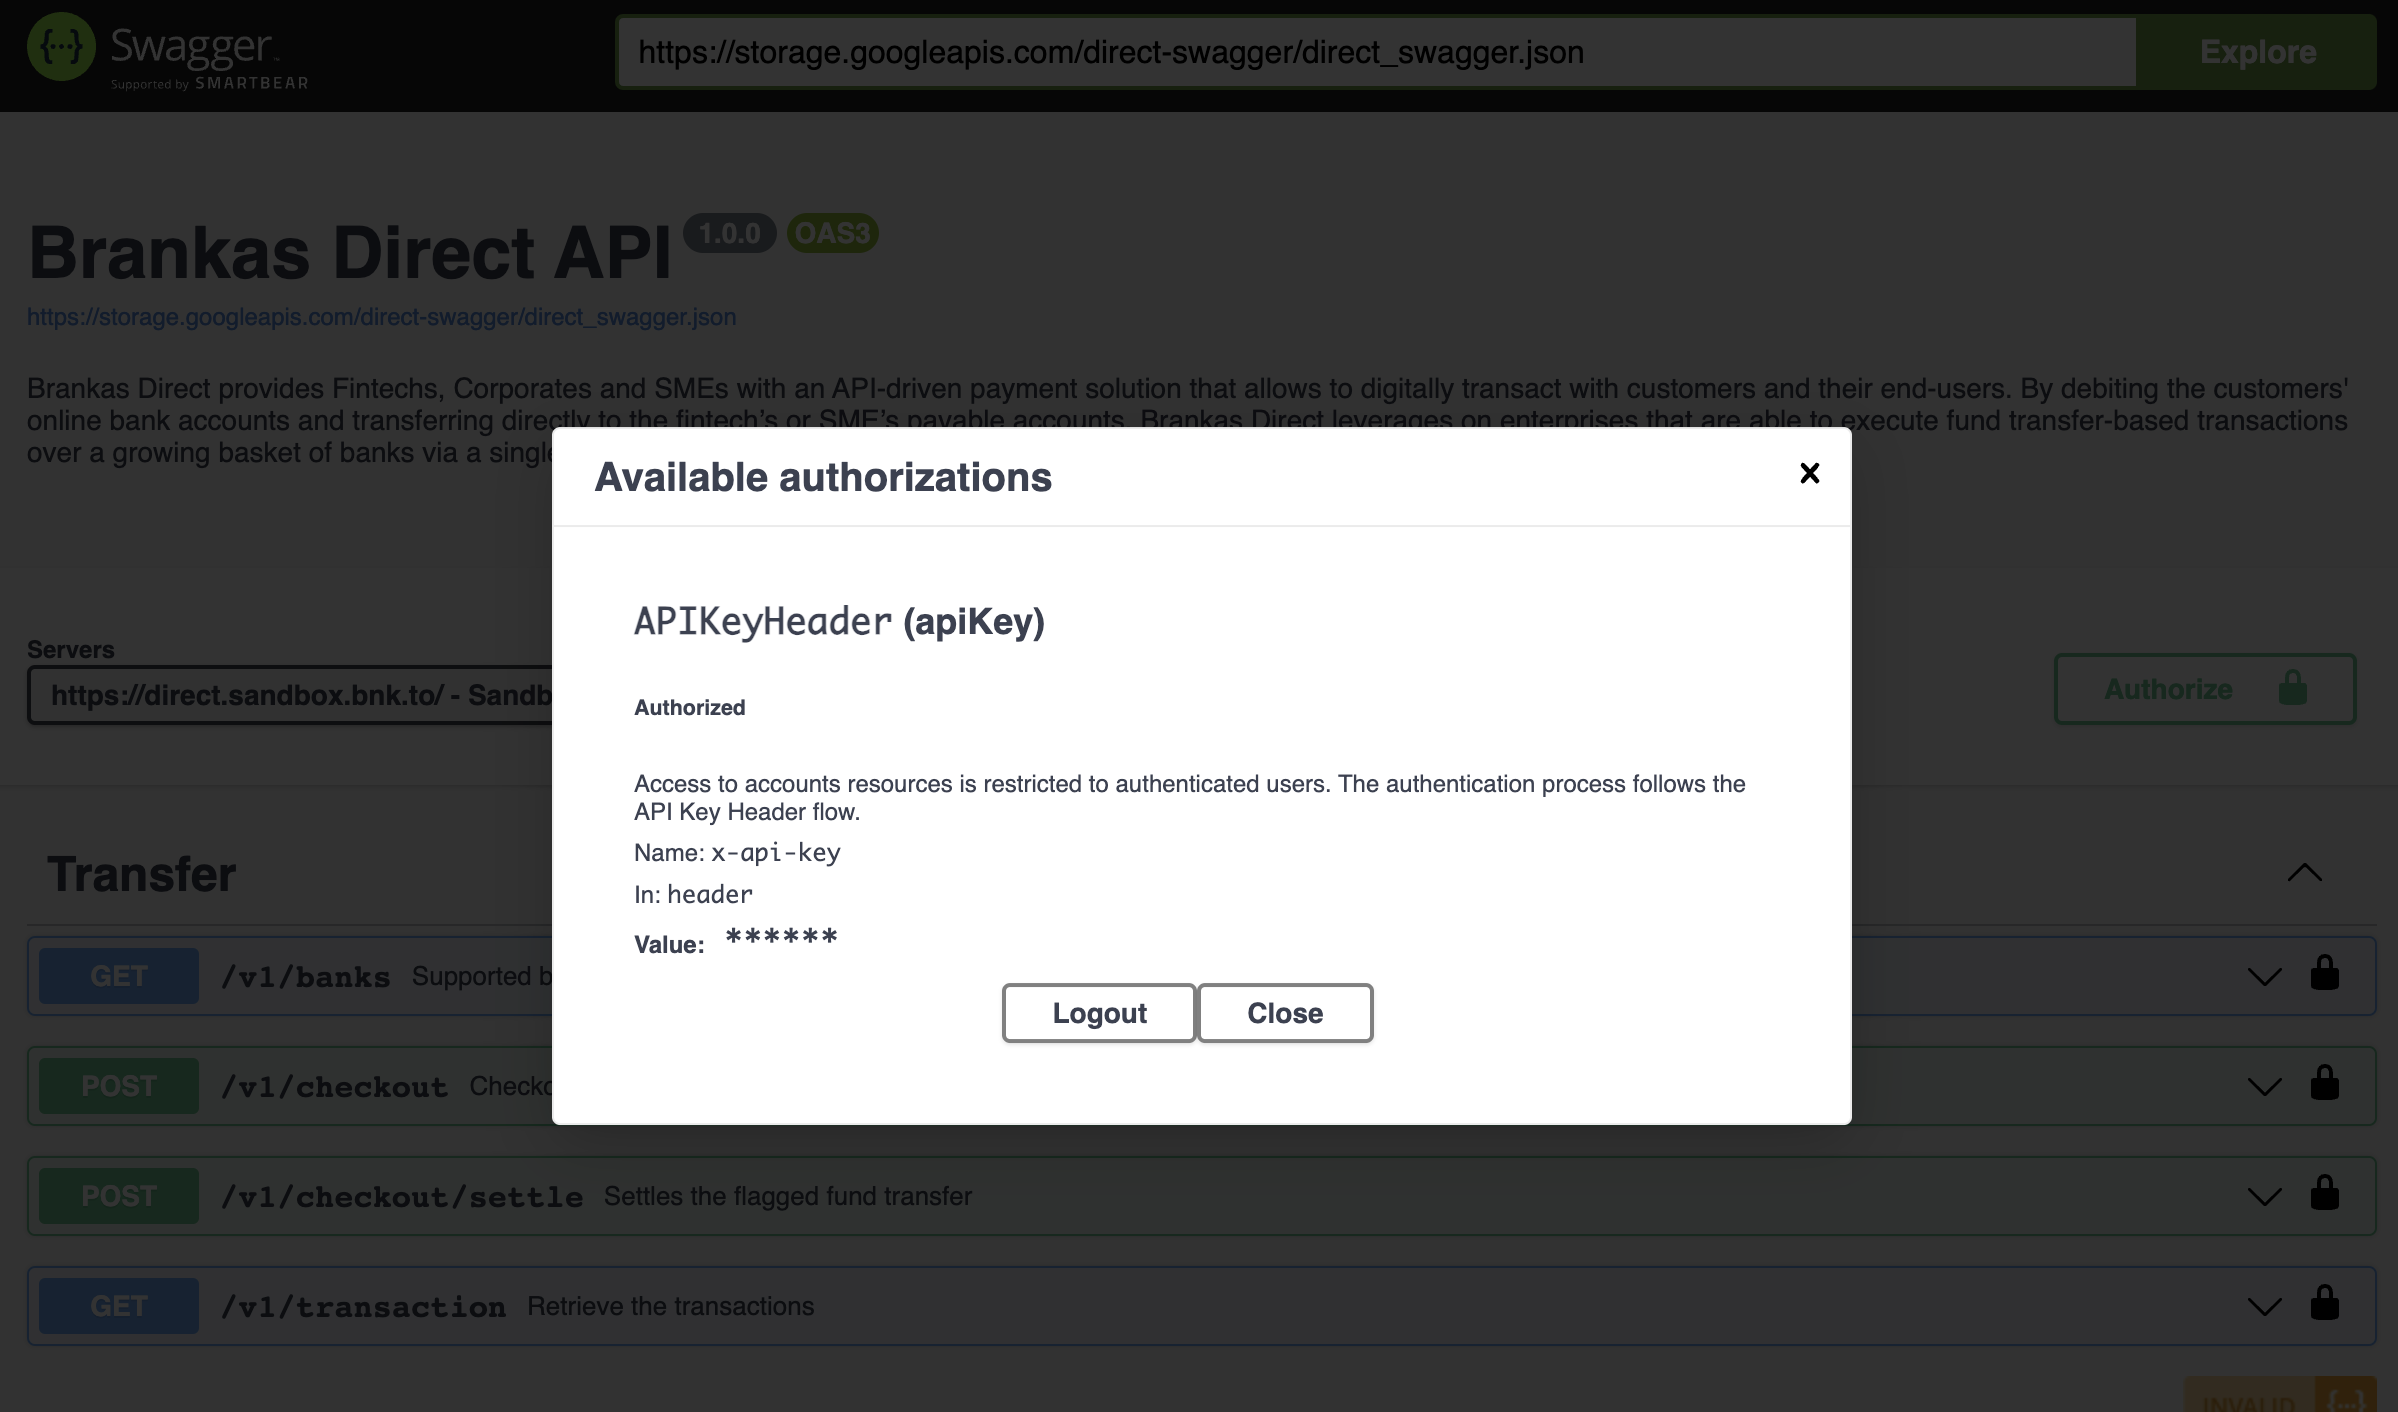
- After clicking 'Authorize' you will receive this message and can now begin testing our endpoints.
Create your first Sandbox Transaction
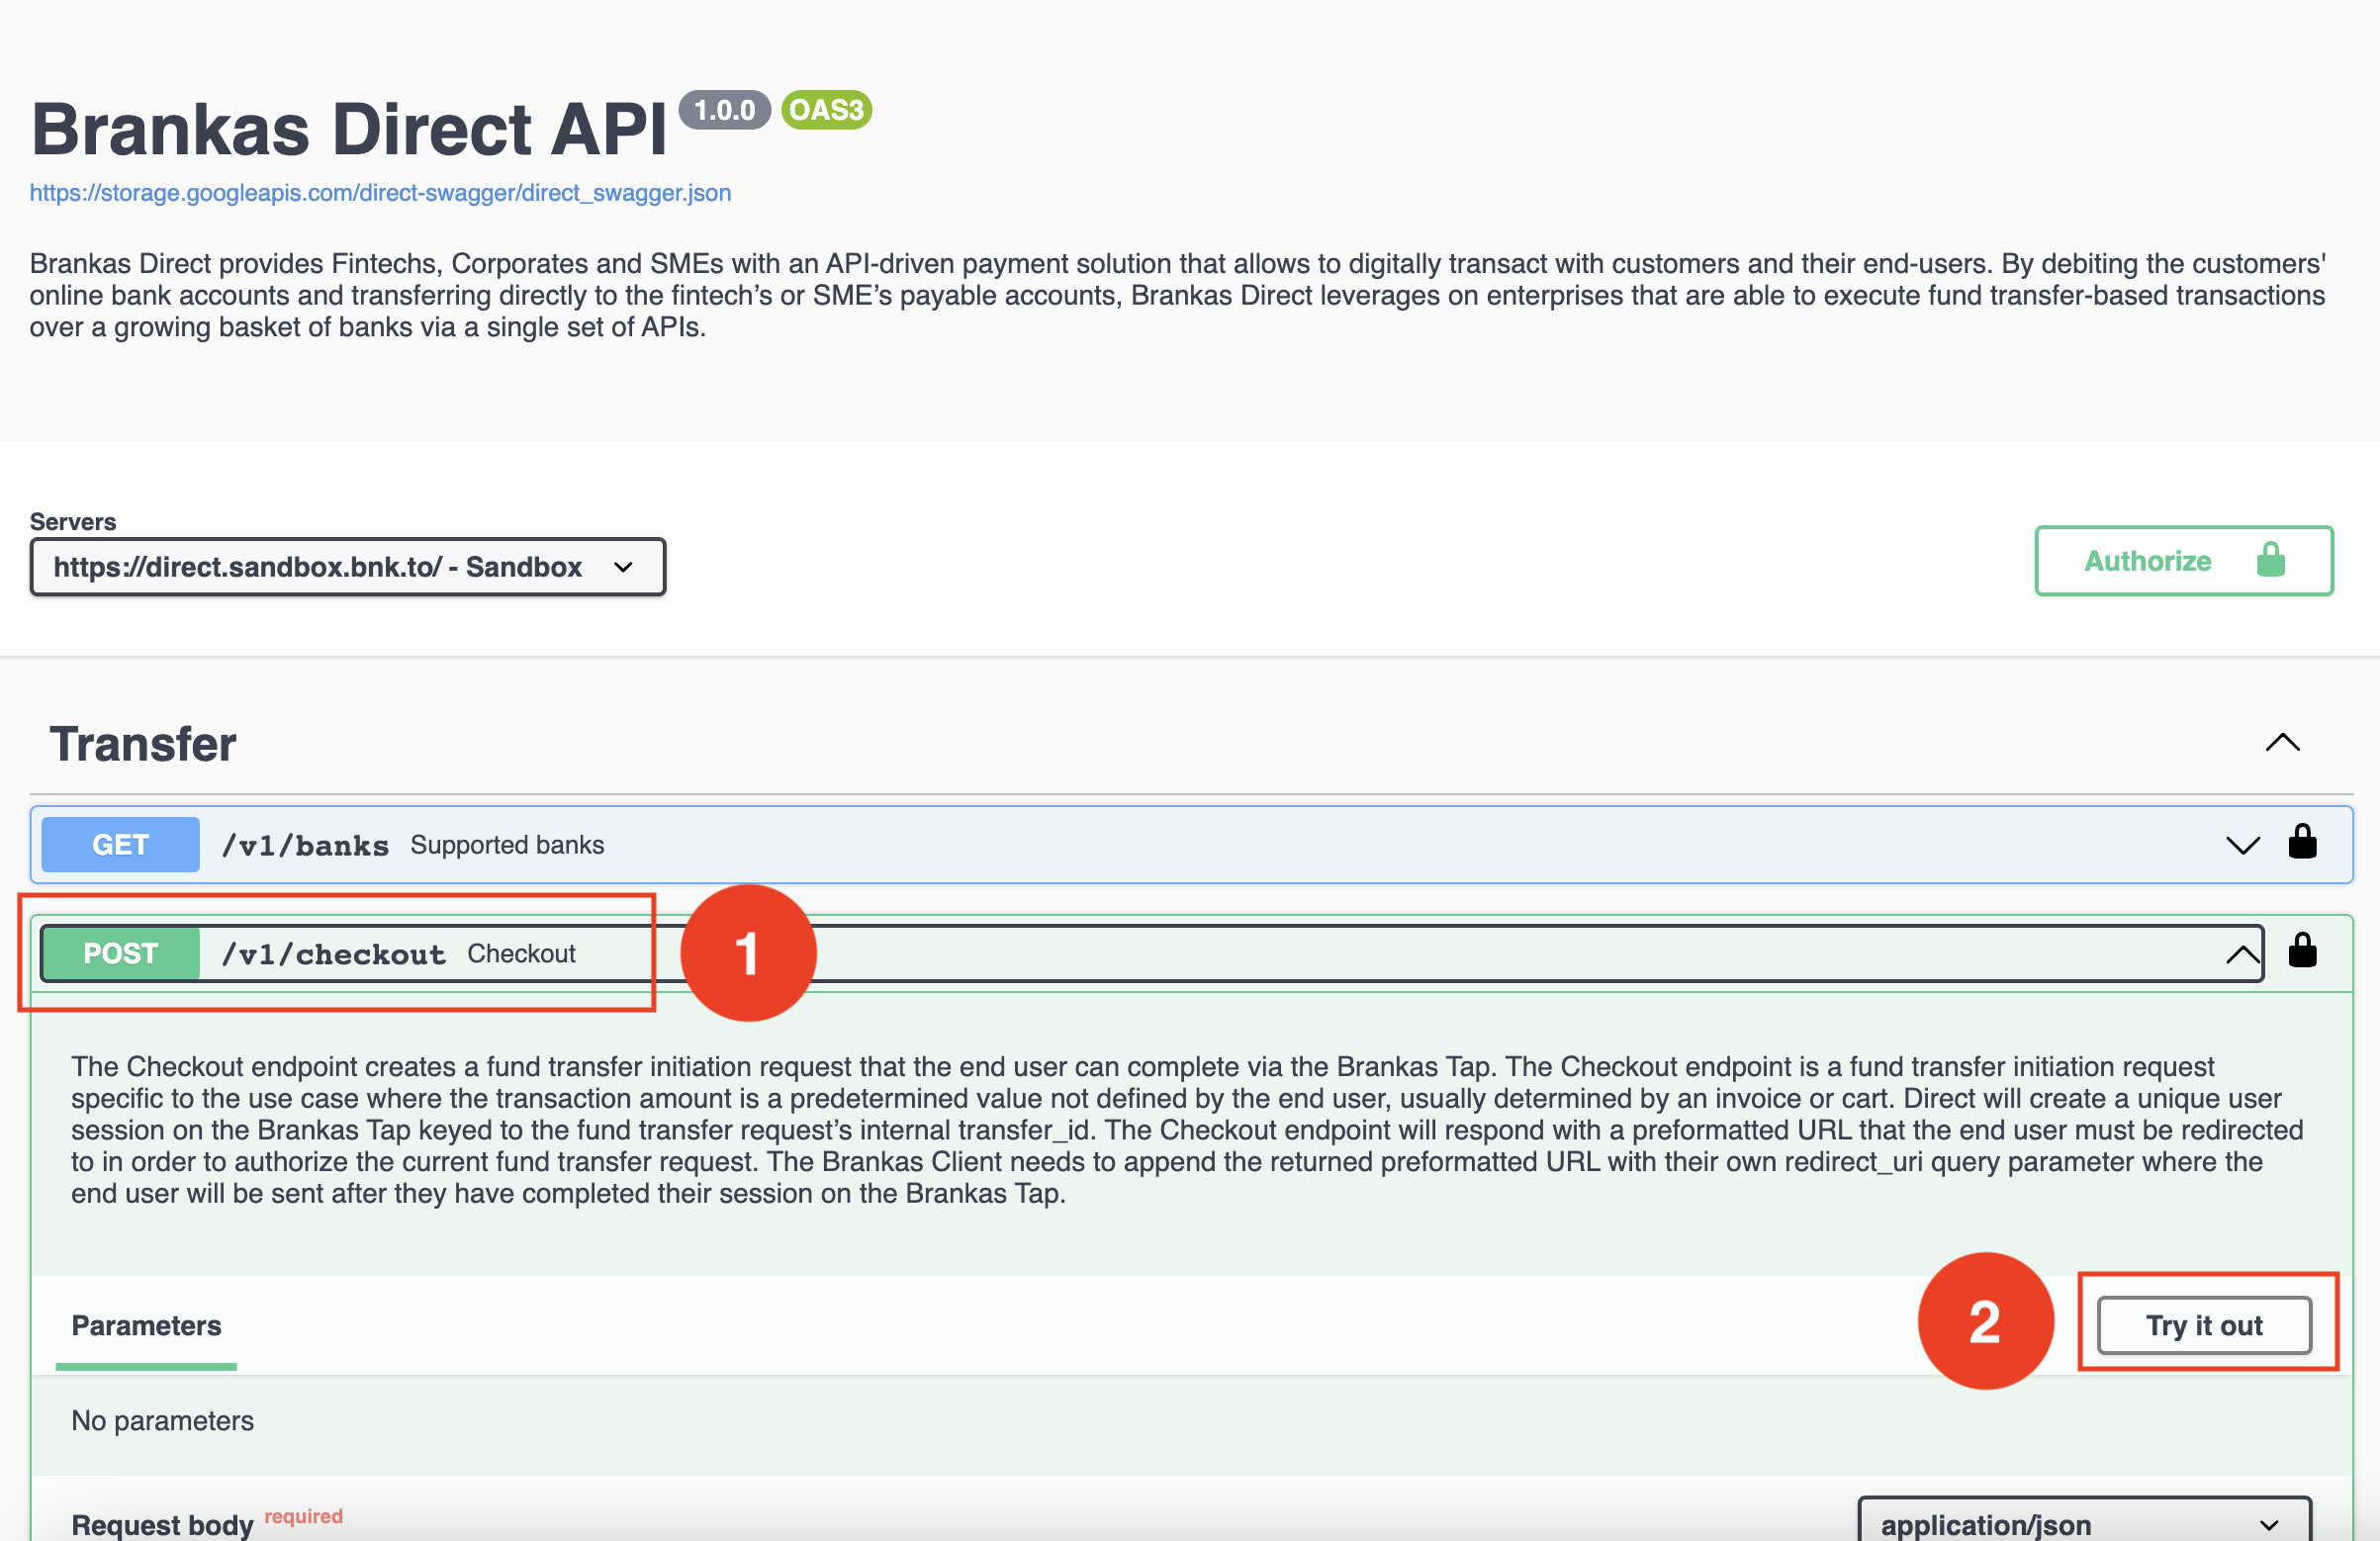
- Expand /v1/checkout menu and select "Try It Out"
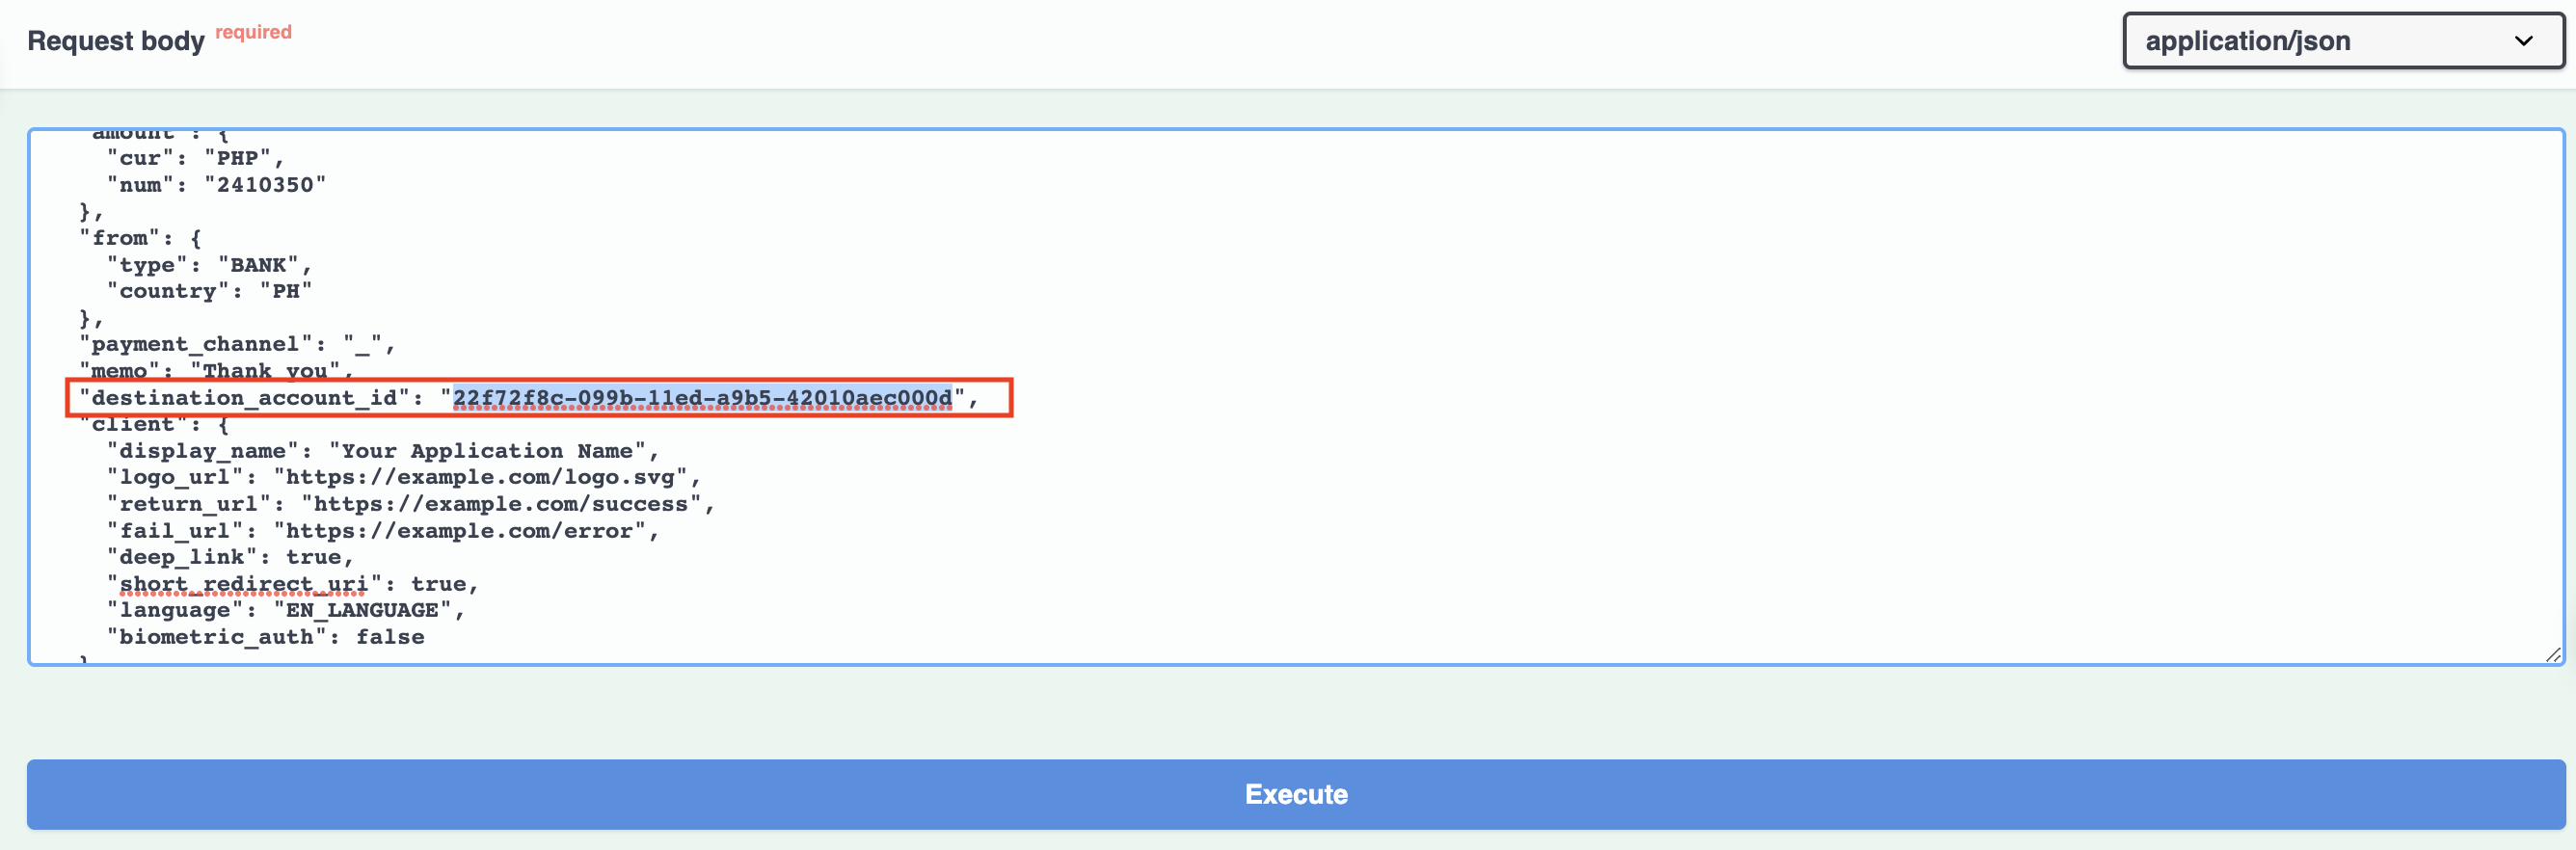
- Replace “destination account id”: “22f72f8c-099b…..” with Brankas destination account ID
- To find the destination ID: Go to settings on the dashboard > click 'Bank Account' > select 'ID'
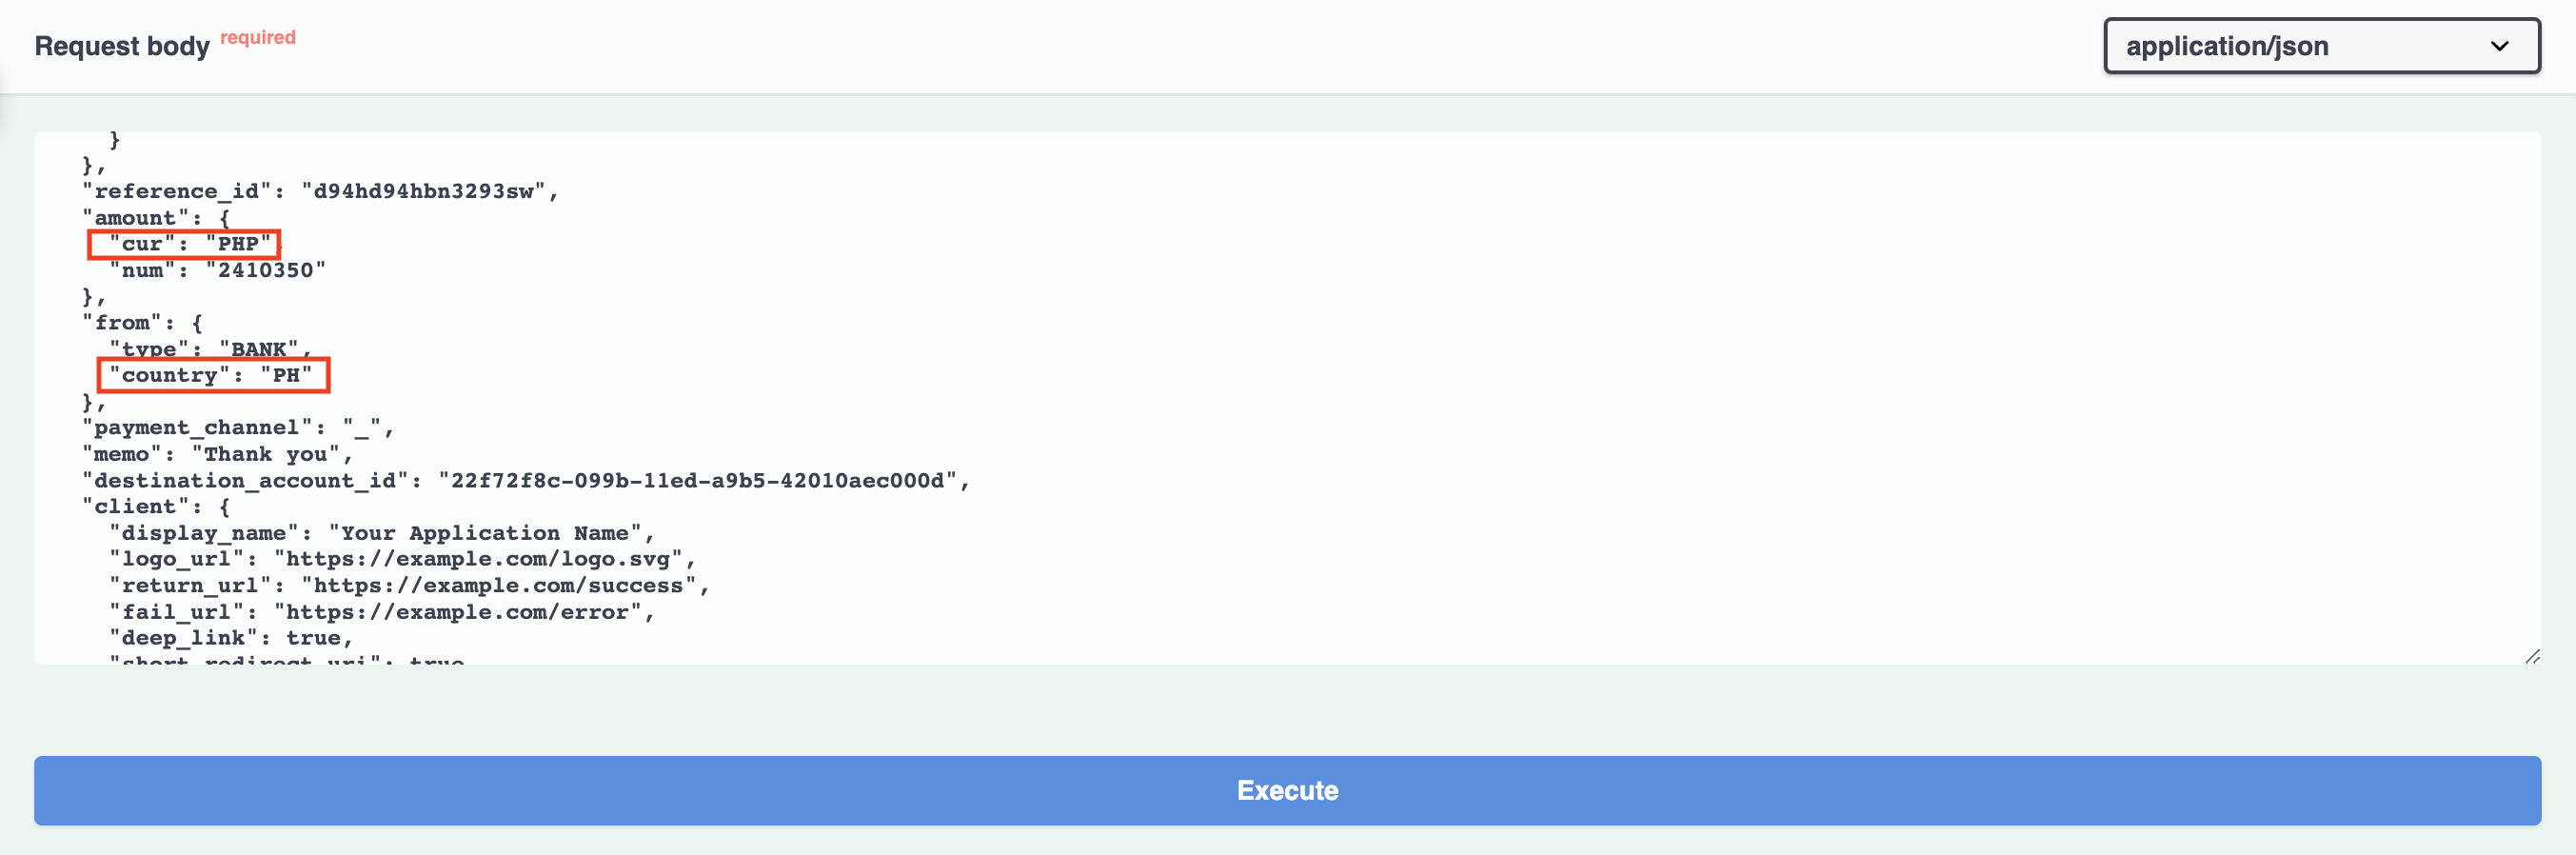
- Adjust the:
- Currency in 'amount': to PHP or IDR, depending on the bank that you will be using.
- Country to ID or PH: depending on which country you are located in.
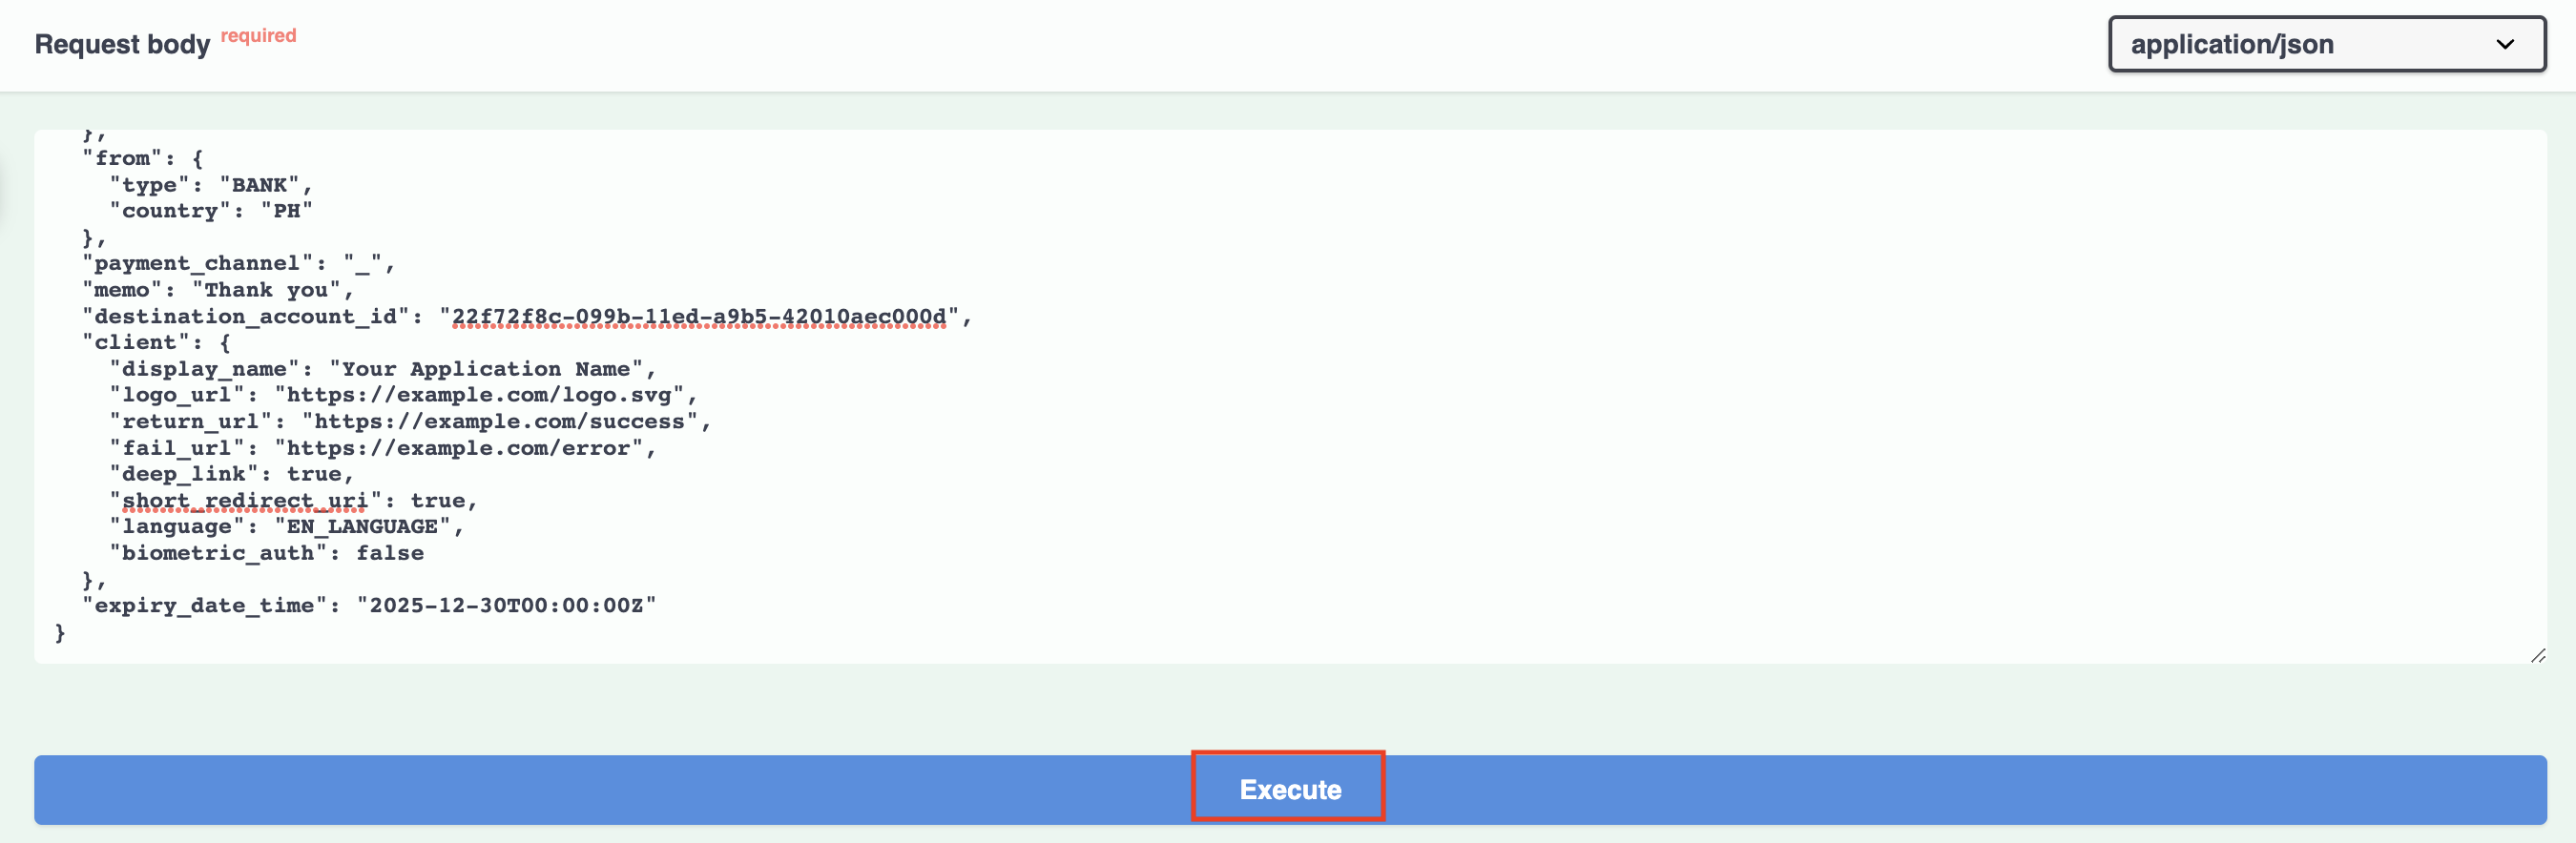
- Click "Execute".
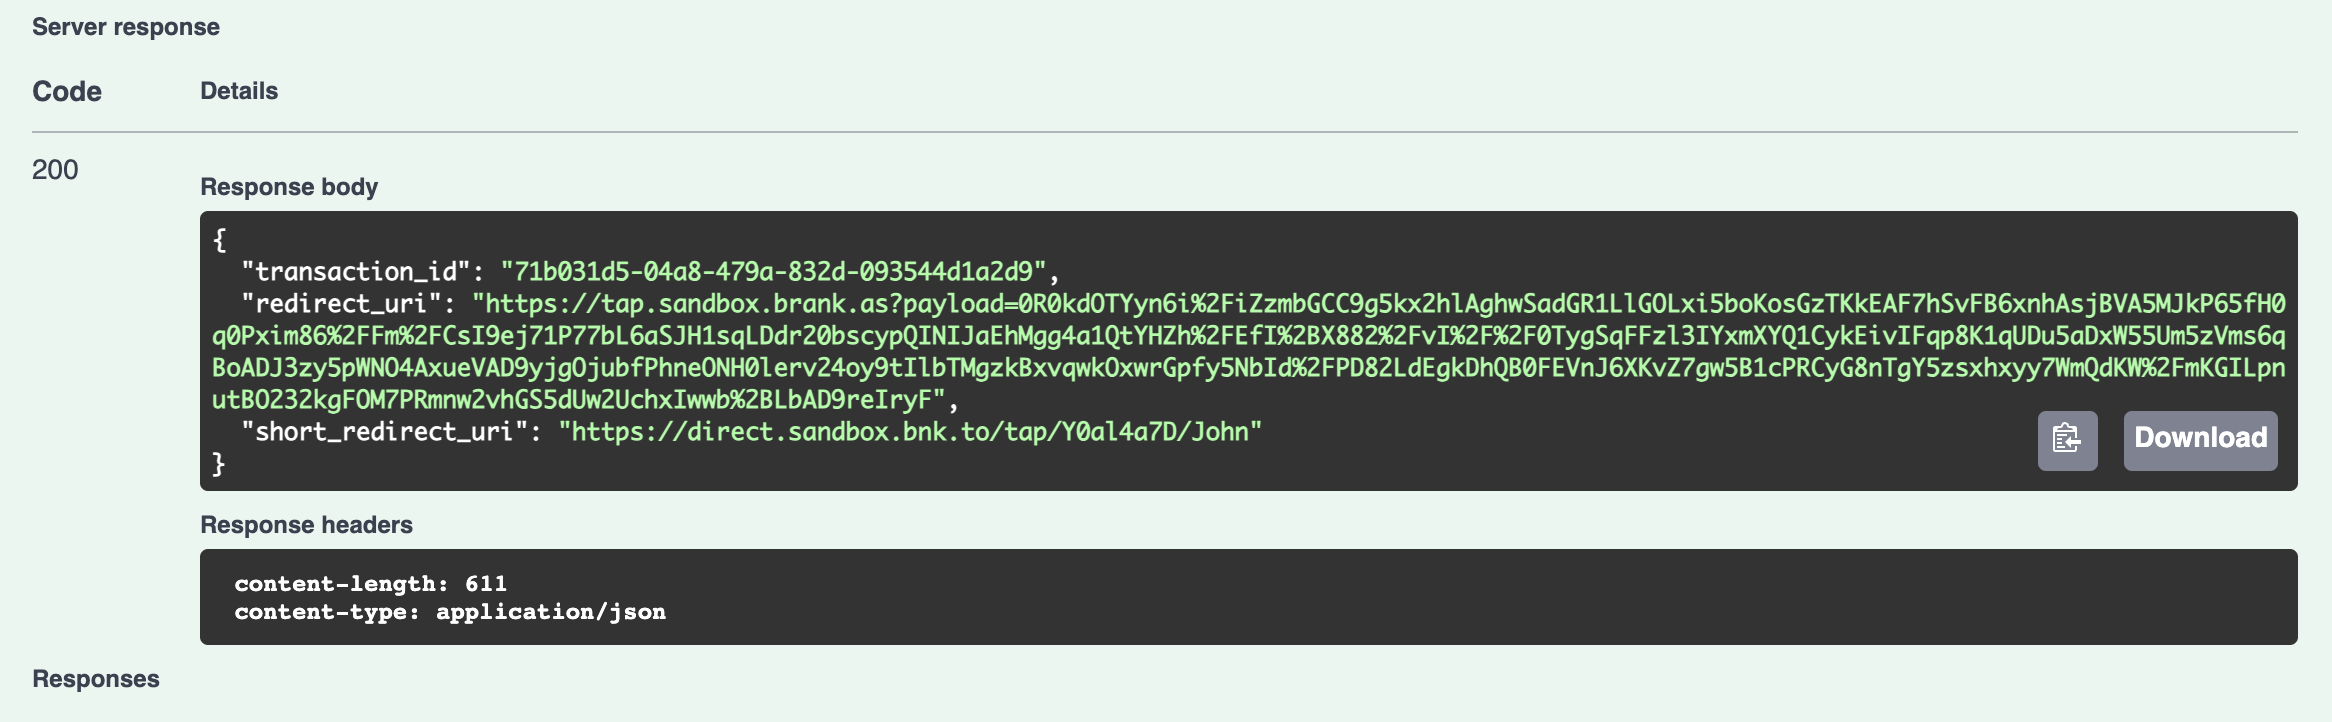
- Now you have successfully initiated the first transaction in Brankas Sandbox. The redirect_uri will direct you to Brankas Tap.
- Upon selecting any available source bank, credentials will be auto-filled and able to perform complete transaction.
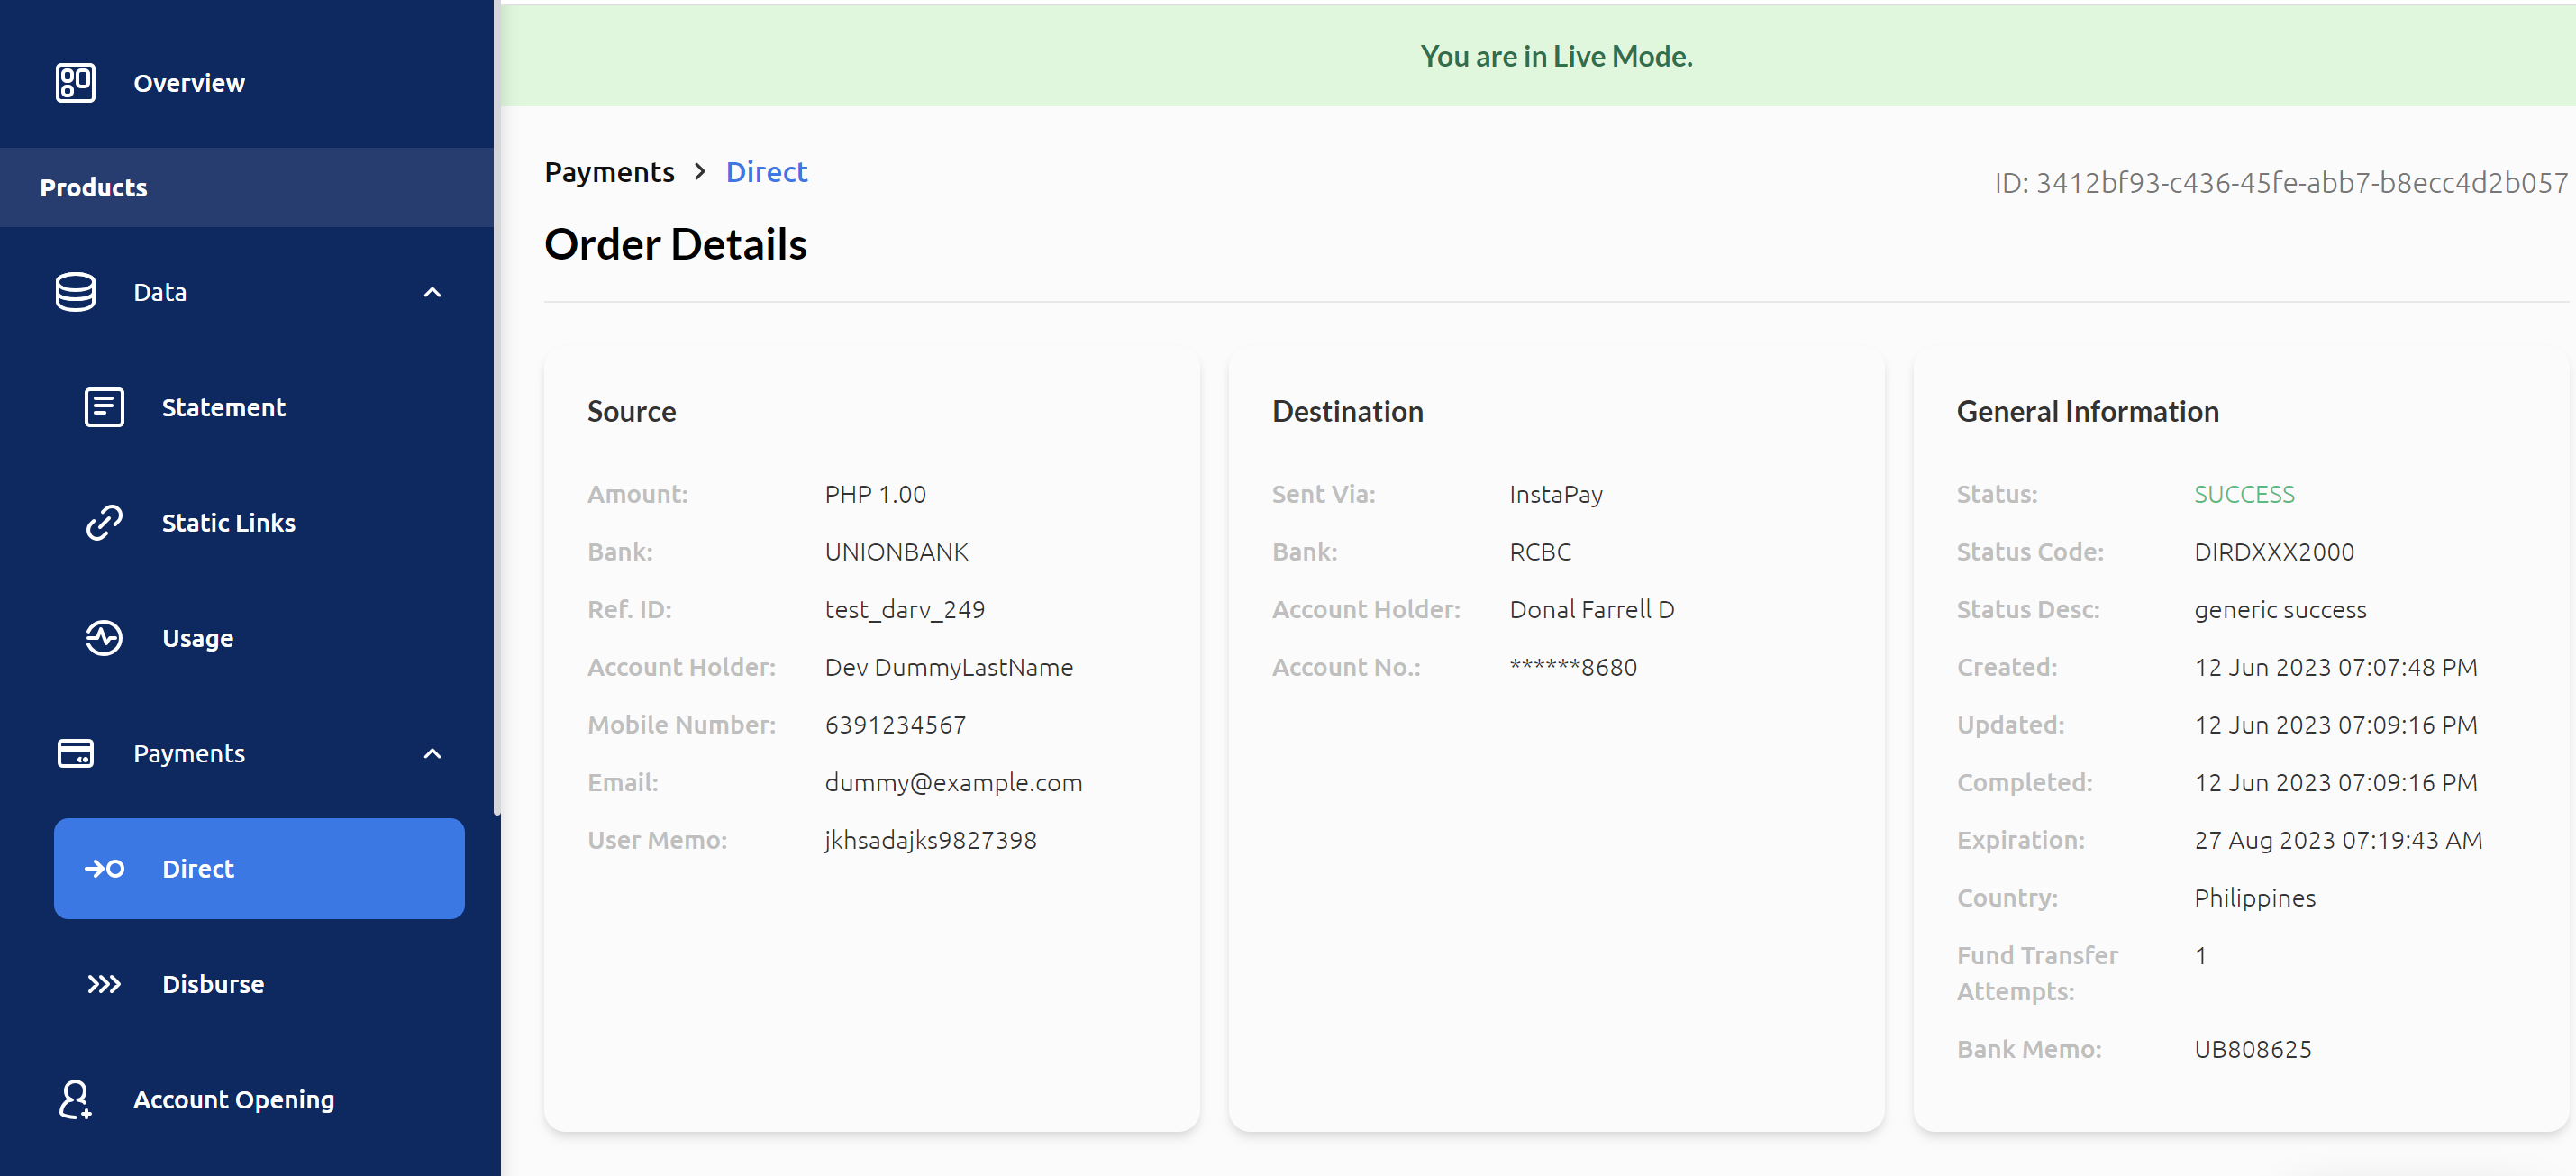
- After the transaction has turned into success or failed, details will be tracked on Brankas Direct dashboard.
Check out the FAQ if you are having difficulties with your Sandbox transaction
Implementation Notes Details:
- Avoid special characters to be included in our parameter value.
- For memo:
- For ID banks, ensure the length is maintained less than 18 characters.
- For PH banks, ensure the length is maintained in between 10 - 30 characters
- Reference ID tagged with successful transaction can't re-use anymore. Please ensure each transaction set a unique reference_id.
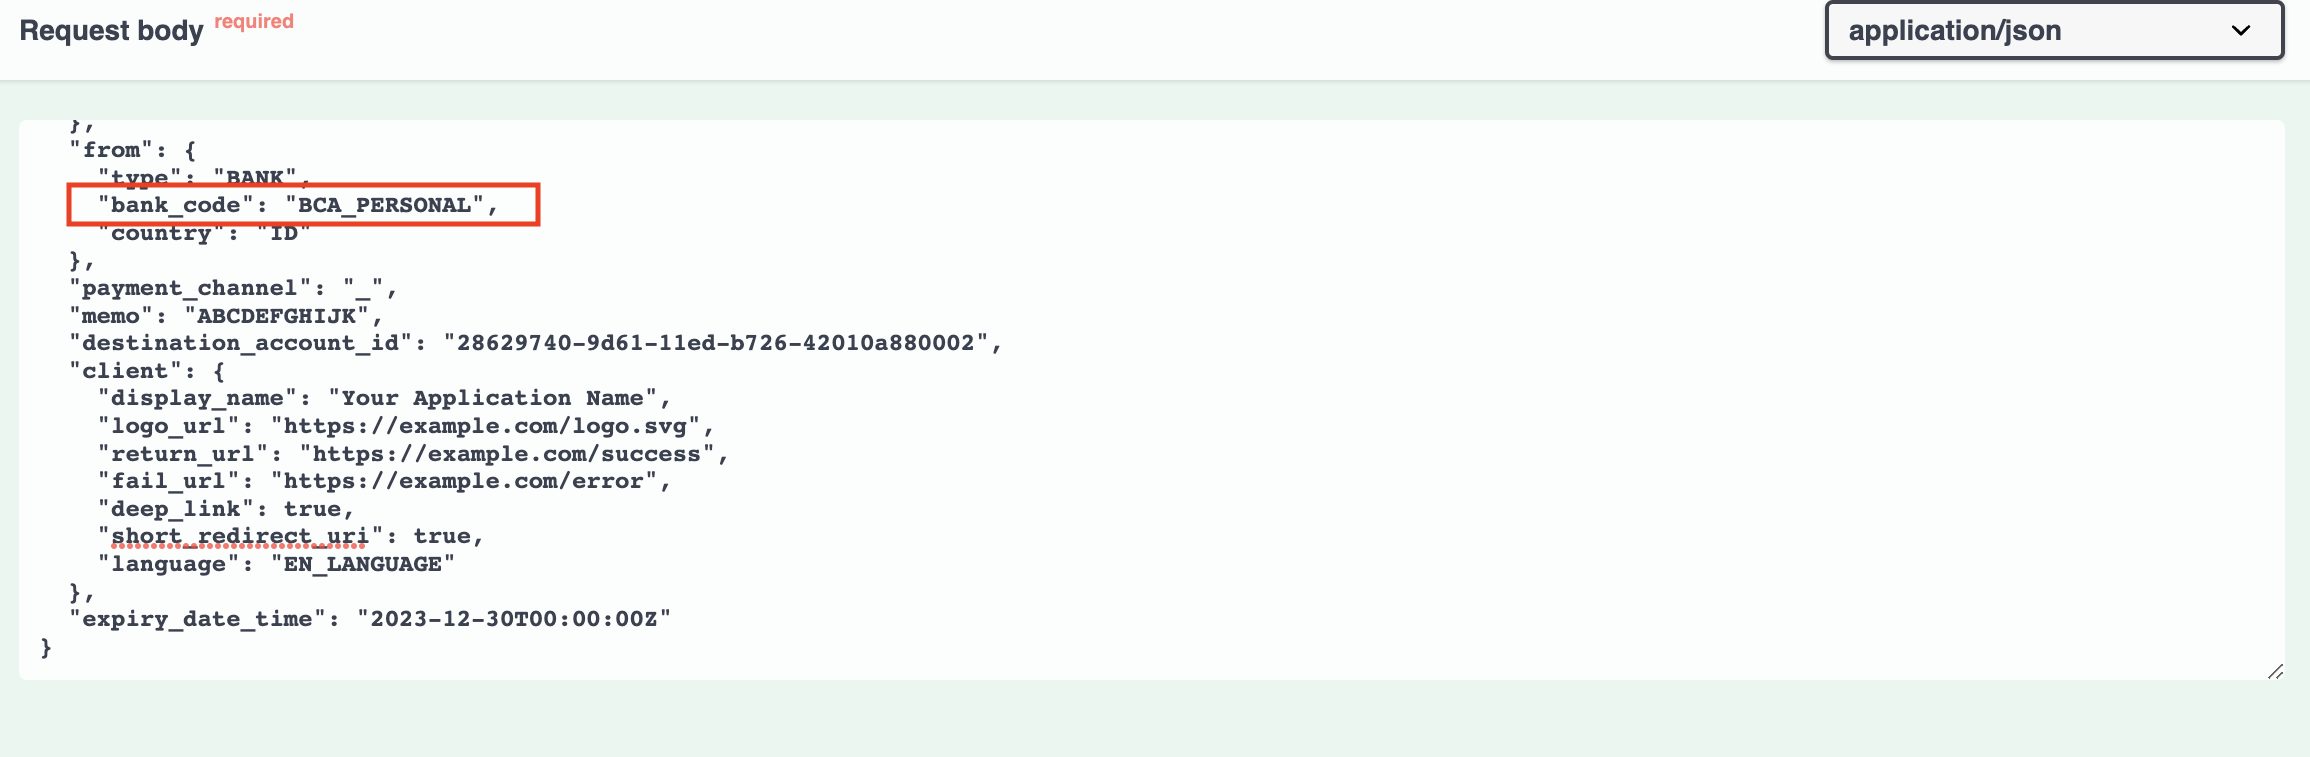
- Adding bank_code under the “from” object will redirect to Brankas bank login page instead of going to the bank selector page. This means merchants will be hosting a bank list directly on their app or website interface
- “expiry_date_time” – the expiration of your transaction and format has to be in UTC+0.
- For example: 2023-08-26T23:19:43Z. If this parameter is not included on the payload, our system automatically sets the expiry to 24 hours upon the creation time of the transaction.
- Make sure that the expiry date & time is also beyond the current date and time (e.g. beyond July 2023)
- Amount is an enum currency and number corresponding to an amount. If minor currency units are supported by a currency, then they are stored as minor units.
- For example: PHP 24,103.50 would be represented as "amount.cur": "PHP" and "amount.num": "2410350".
Go Live with Us
Updated 10 months ago
Did this page help you?