
Live Access Checklist
Complete these steps before operating in a Live Environment.
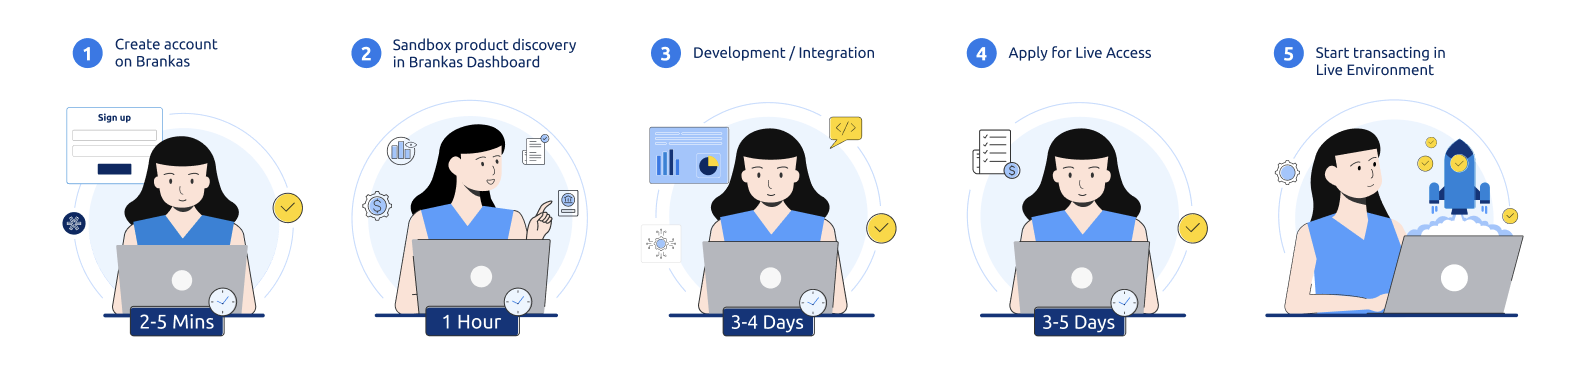
Below is a list of steps that you need to complete before using Brankas in a live environment. These steps will help you use Brankas as smoothly as possible.
As a reminder, Brankas provides two modes:
| Environment | Description |
|---|---|
| Sandbox | A testing ground that allows you to test Brankas APIs with test banks, transactions, and currency. Sandbox endpoints contain .sandbox.bnk.to in the base URL. |
| Live | After you have tested in sandbox mode and you can go live with us and transact in real-time. |
Go-Live Checklist
Test out the different products that we offer through the different Postman guides
Prepare the documents that you need in order to go live (ID, PH, other countries)
Apply for Live Access
After receiving live access, you can begin testing your products in Live Mode
Begin transacting in real time
Once you’re satisfied with testing on the production environment, you can immediately go live and empower your business using Brankas. After Go Live, you can also track transaction statuses on Brankas Dashboard and export transaction history by selecting Export CSV, Date Range, and Download Report
Reach out to our team at[email protected], if you have any questions along the way.
Updated 10 months ago
Did this page help you?