
Get Started with Disburse
A step-by-step guide to help you get started with Disburse.
Let's get started by running Disburse in the sandbox environment. To start, you will need to sign up for an account on the Brankas Dashboard and generate an API key. We will be guiding you through in this article from how to get started in the sandbox environment followed by the transition to go live.
Set Up Your Sandbox
There are 2 environments available. In the Sandbox environment, you can transact and call data with dummy banks, amounts, currencies and prototype your integrations. There are no limits in the sandbox environment and when you are ready, transition to the live mode where you will be transacting and calling data from customers.
We will be walking you through how to get started in the sandbox environment in this article.
Brankas provides 2 modes:
| Environment | Description |
|---|---|
| Sandbox | A testing ground that allows you to test Brankas APIs with test banks, transactions, and currency. Sandbox endpoints contain .sandbox.bnk.to in the base URL. |
| Live | After you have tested in sandbox mode and are ready to go live, submit your go-live requirements on the Brankas Dashboard, and our team will be reaching out to you shortly. |
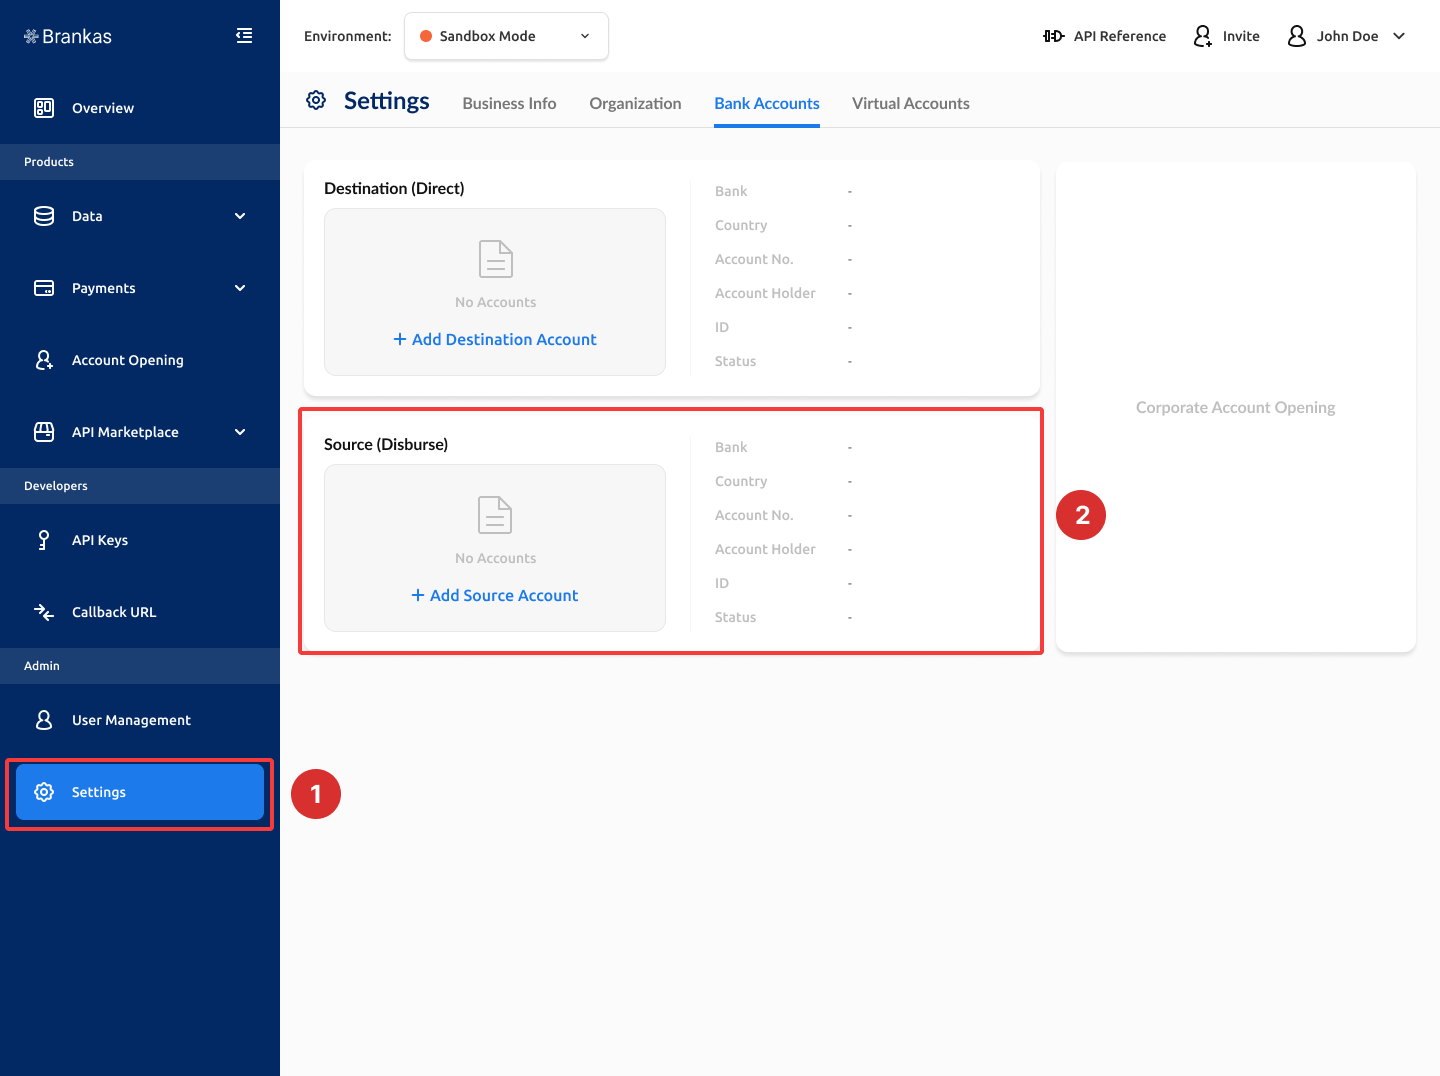
- To start integrating with Brankas products, sign up for an account.
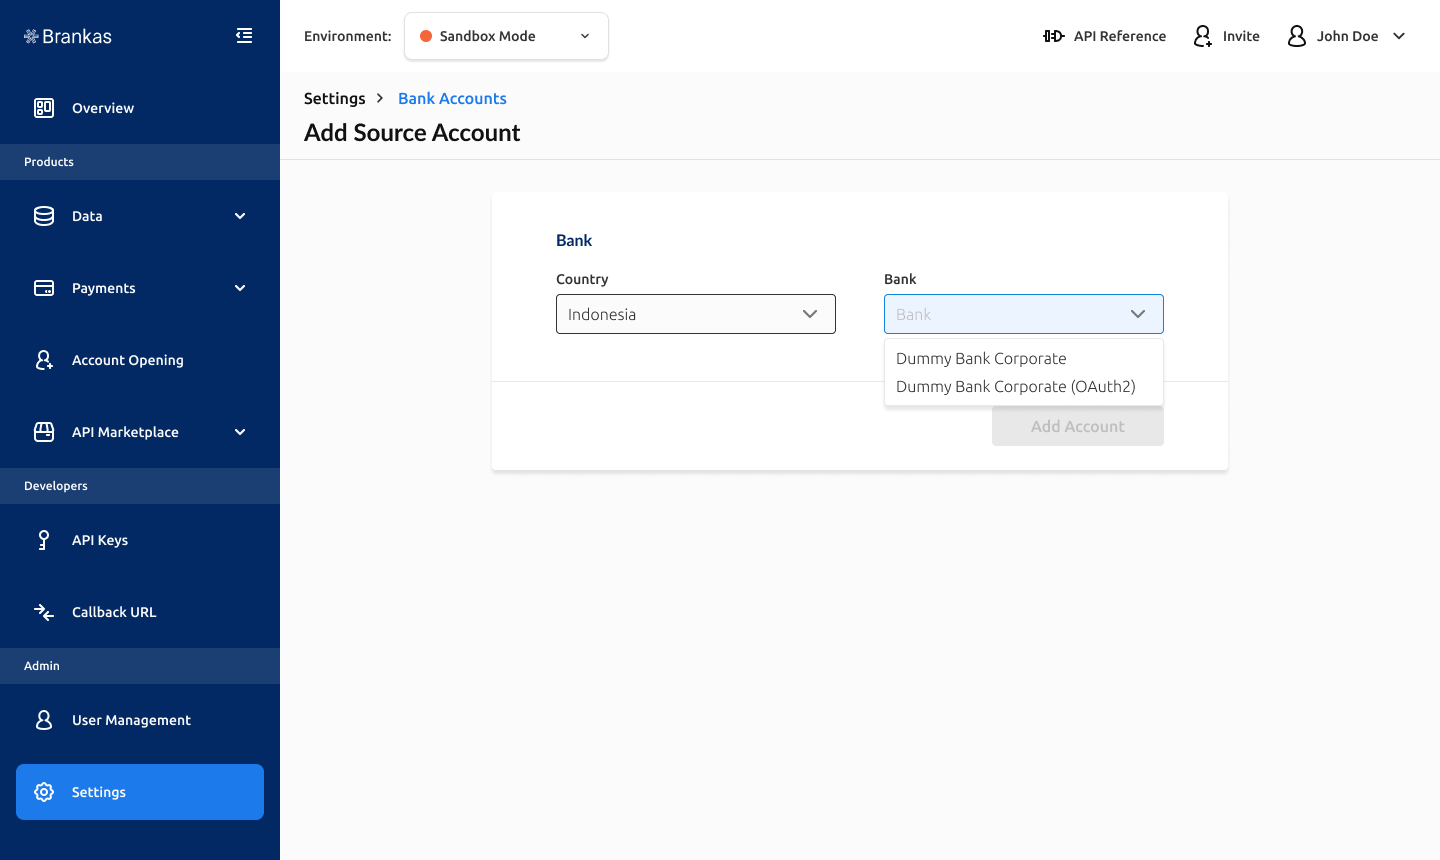
- Add a dummy destination account by selecting Brankas Dummy Bank Corporate.
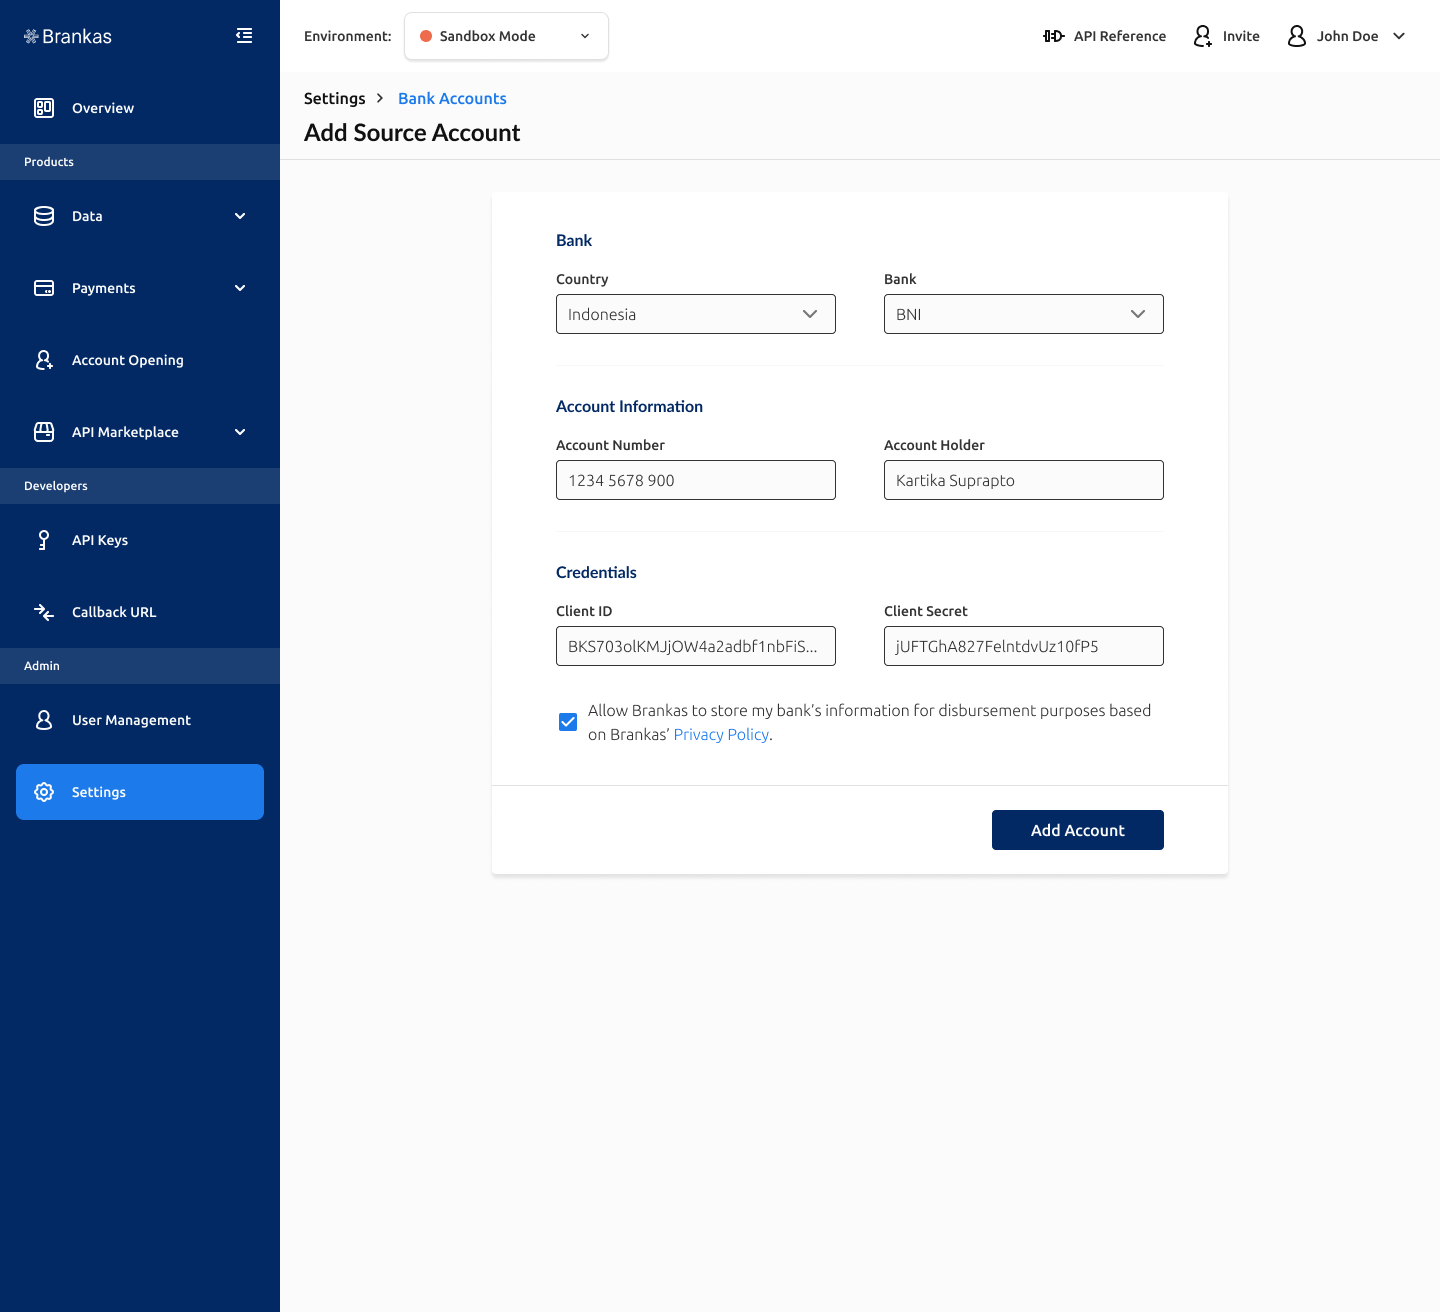
The Brankas Dummy Bank Corporate simulates adding corporate bank accounts. Enter these details for the following fields:
Client ID: brankas-test
Client Secret: brankas-test-secret
Partner ID: Fill in any details
- Next, add Beneficiaries account. You have the option of adding beneficiaries account details in Settings or while processing disbursements. Select Brankas Dummy Destination Bank in the dropdown. Select either Corporate or Personal as the account type and enter dummy account number and holder. For example,
Account Number: 12345678
Account Holder: John Doe
If you are testing for Netbank, select Philippines as the country and Netbank UAT as the bank in the dropdown. Enter dummy account number, holder, customer ID and company address. Select next to proceed.
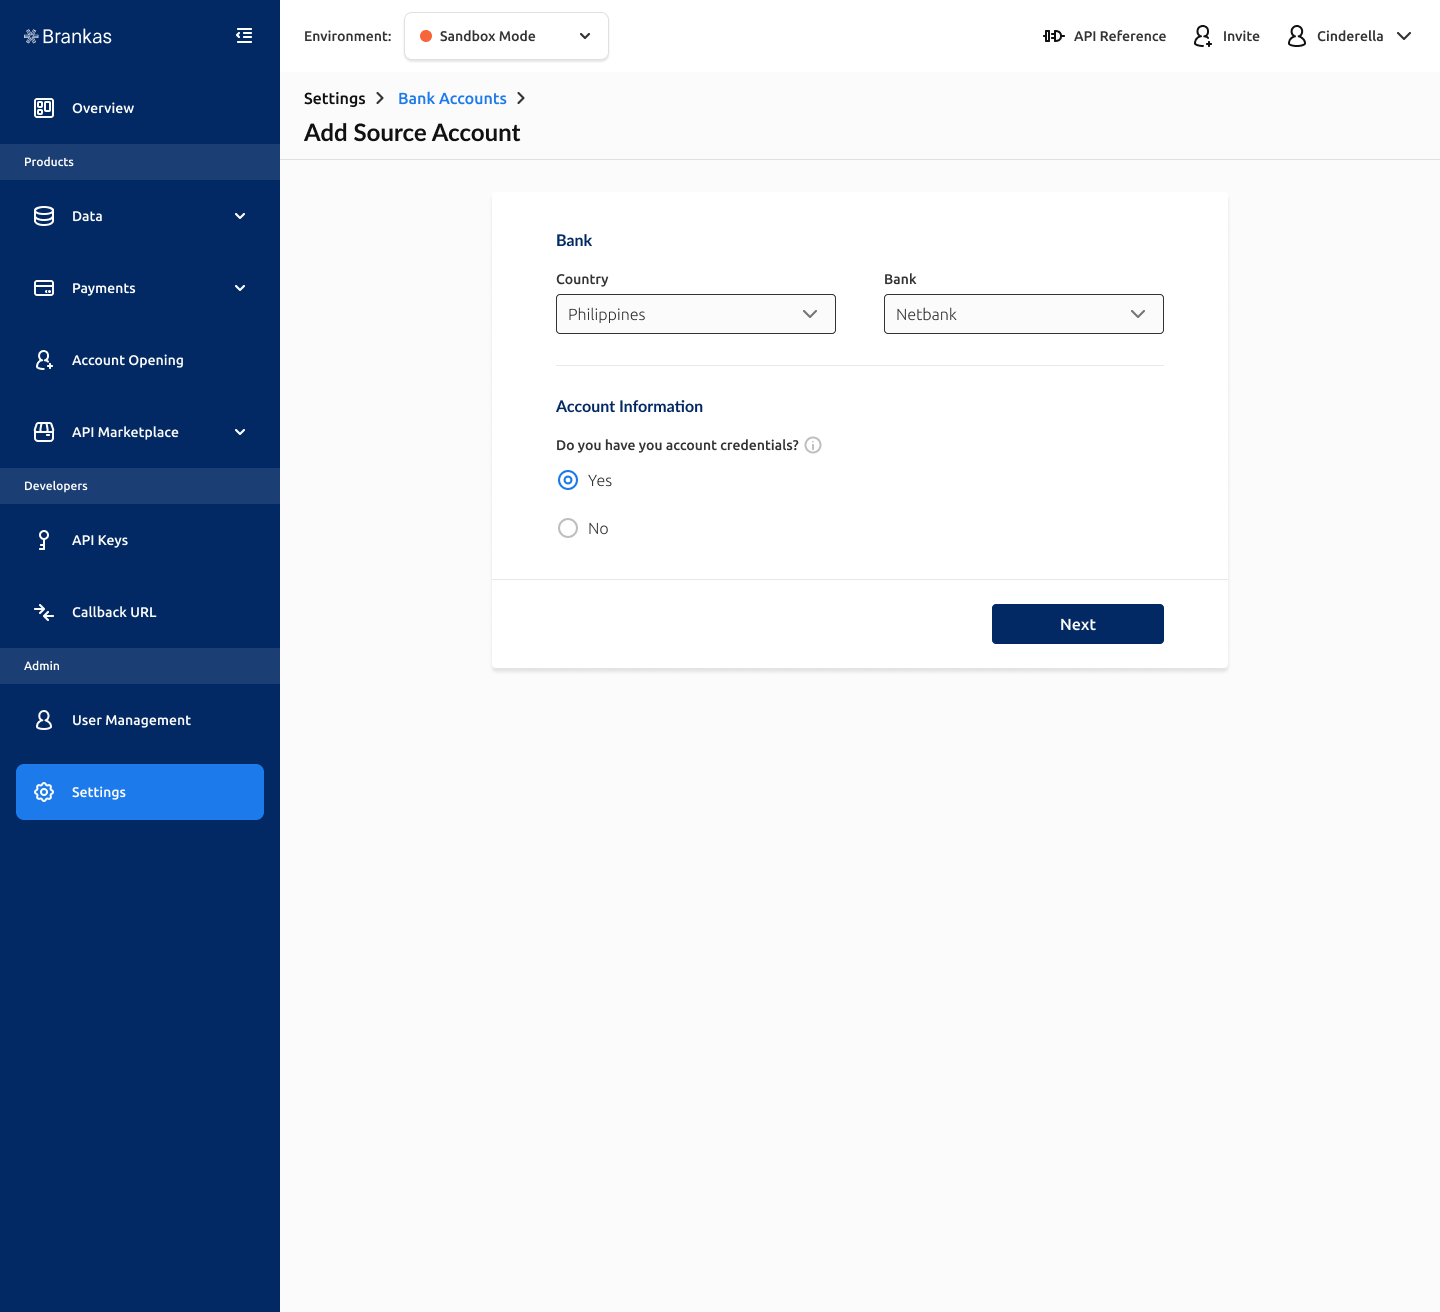
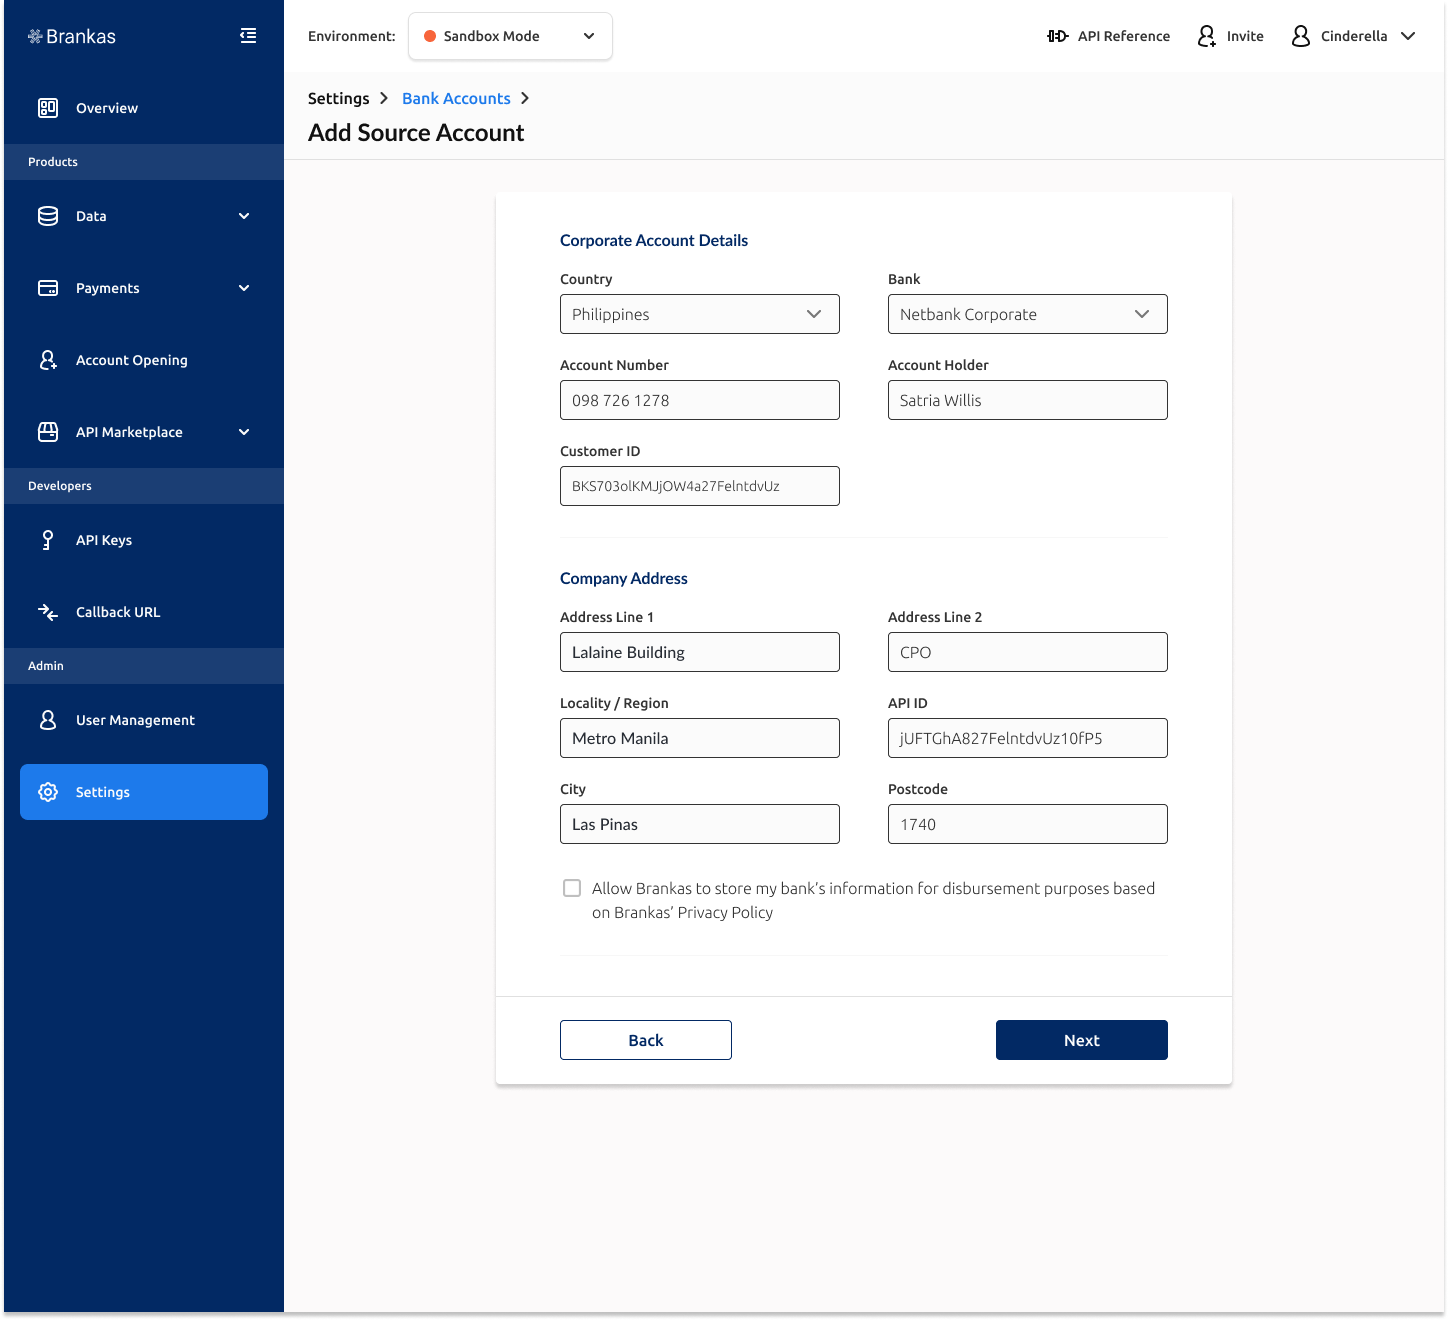
Request CredentialsReach out to our team at [email protected] for Netbank credentials.
Single Payout
- You are now ready to create a single payout. Select Single Payout on the Disburse page.

- Select a beneficiary or add a beneficiary if it is not already in the list.

- Add details to the disbursement such as amount, remarks and disbursement type. Click Submit request.
Minimum Disbursement Amount
PHP 100.00
IDR 10,000.00

- Assigned approver will be notified via email to review the disbursement request.
.png")
Bulk Disbursement
- Select bulk disbursement and download the CSV template.

- Fill the CSV template with the disbursement details. Save as a CSV template and upload.

| Field | Instructions | Sample Input |
|---|---|---|
| Account ID | Account ID is the ID for each beneficiary of the related disbursement | 753560f7-ac8d-469f-895d-83850417fd63 |
| Currency | Currency is the currency of the disbursement (IDR/PHP) | PHP, IDR |
| Amount | The amount of the disbursement (Do not use comma. Use period for cents) | 700, 70000, 700.70 |
| Description (Optional) | Remarks for each disbursement within the bulk disbursement request. No special characters. Alpha numeric only (A-Z, 0-9) | This is a sample remarks for disbursement 001 |
- An overview of the disbursements will be presented upon upload. If there are errors found, it will be highlighted. To fix the errors, download the file with the highlighted errors and re-upload the CSV file. Upload the fixed file to continue with bulk disbursement.

- Assigned approver will be notified via email to review the disbursement request.

Go Live
Go live IndonesiaIf you are disbursing funds in Indonesia, reach out to our team at [email protected] for detailed requirements.
Once you have tested in the sandbox environment and ready to go live, follow through with these steps:
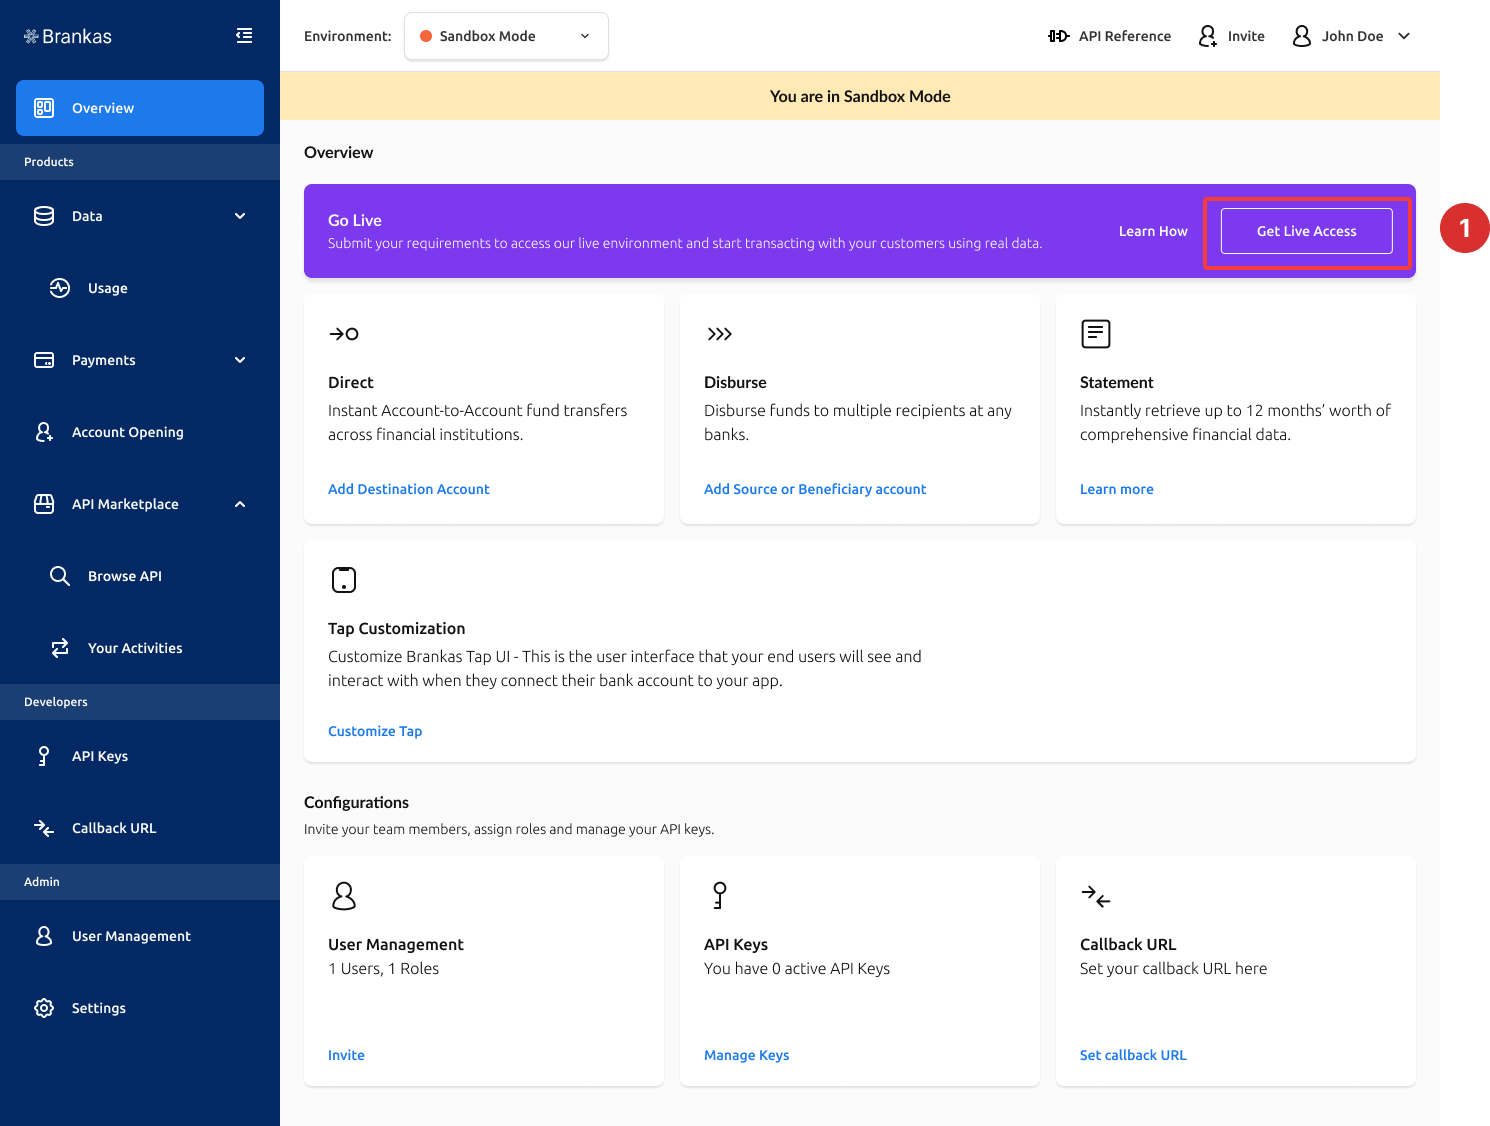
- Click Go Live Requirements in the banner on your Brankas Dashboard.
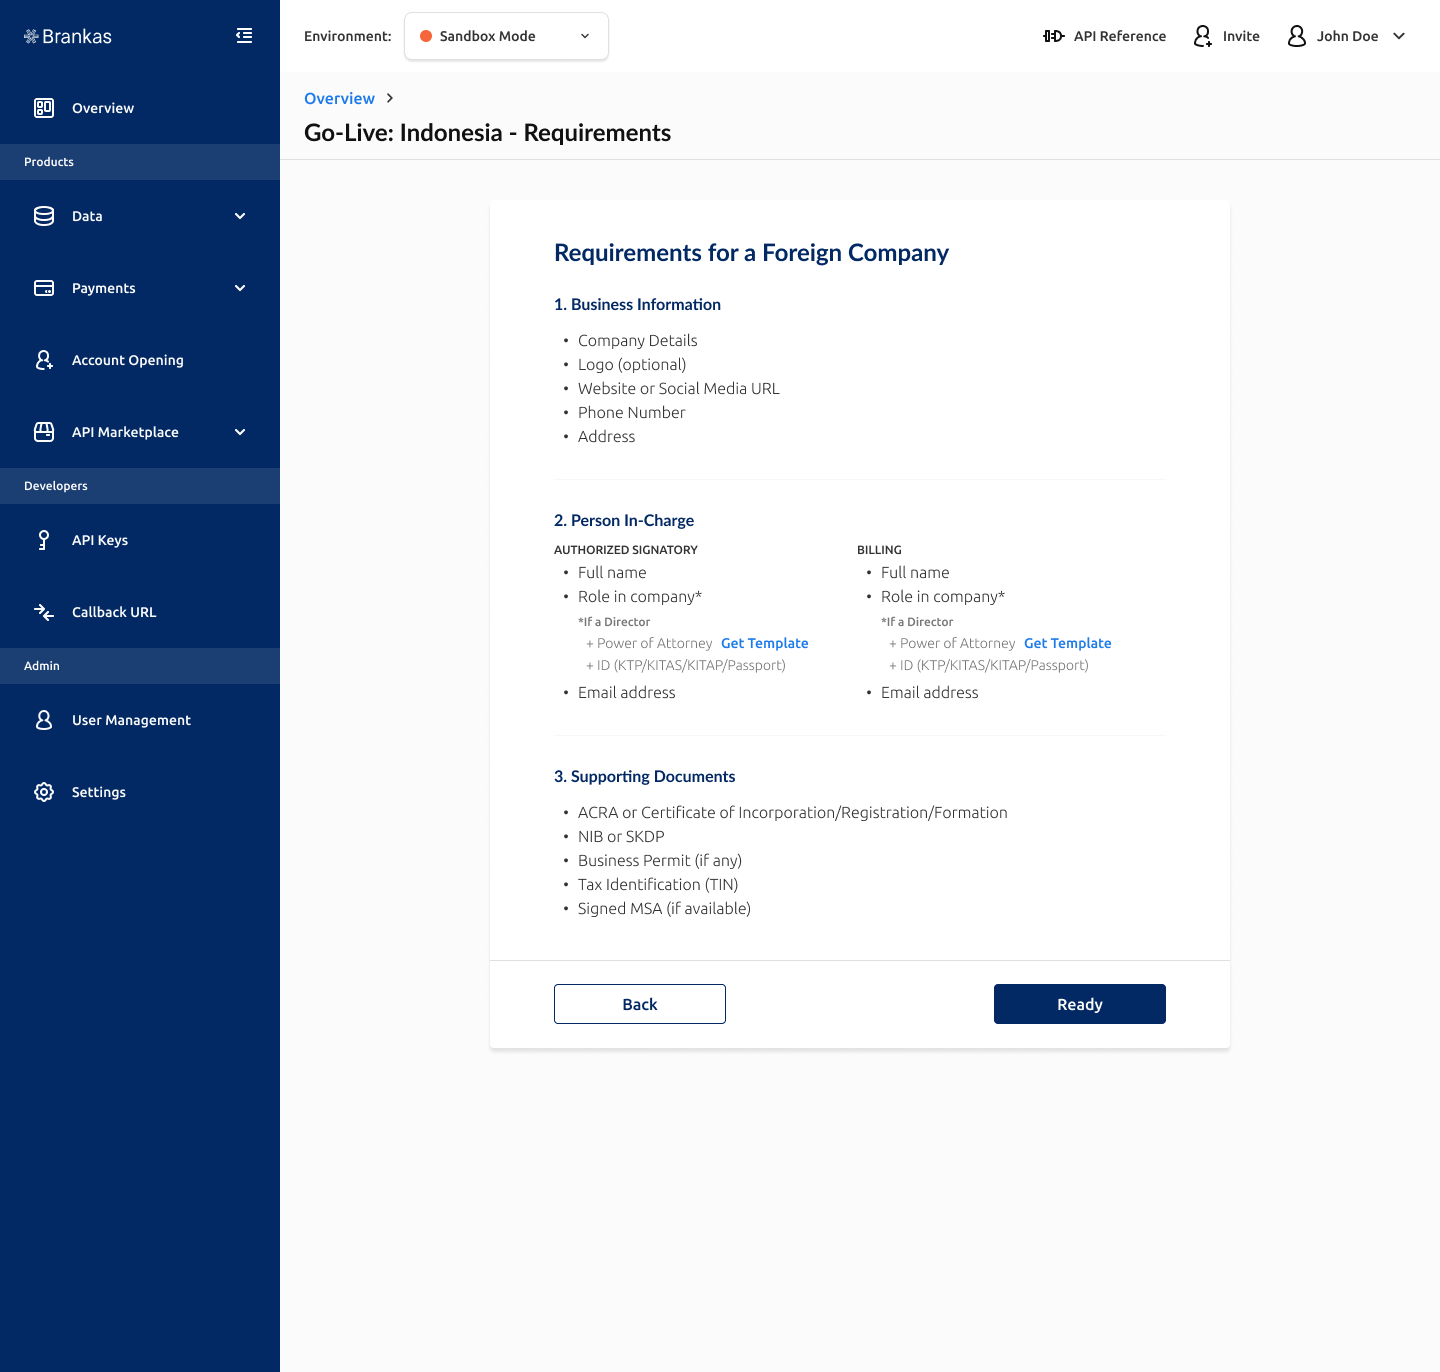
- You will be walked through to submit required documents and details based on your entity and country of operation. Select the tiles applicable to you:

- A summary of required document and details will be listed for you before proceeding. Below is a sample requirement for registering a foreign company in Indonesia.
- Our team will review your submission and reach out to shortly!
Congratulations, you have reached the end of this article!Redeem exclusive Brankas merchandise. Quote “Better With Open Finance” and share this page’s URL to a Brankas representative or email [email protected].